REVIEW · BOURNEMOUTH
City Sightseeing Bournemouth Hop-On Hop-Off Bus Tour
Book on Viator →Operated by City Sightseeing Ltd - UK and Ireland · Bookable on Viator
This City Sightseeing Bournemouth hop-on hop-off tour is an easy way to get your bearings fast, without doing any heavy planning. You’ll cruise past the big waterfront sights, hop down when something grabs you, and use the pass again later if you choose 24 or 48 hours.
I like two things most: the audio commentary in English (useful for history and local context), and the fact that you can time your sightseeing at your pace instead of following a fixed walking route. One watch-out: the schedule is seasonal and buses run on a set rhythm (every 60 minutes), so you’ll want to plan around wait times rather than expect instant arrivals.
In This Review
- Key highlights that make this route worth your time
- 5 key things you’ll notice right away
- How the pass works: 24 or 48 hours, every 60 minutes
- First ride tip: sit up top and let the audio guide you
- Price and value: what $23.43 buys you in practice
- The route in detail: from Bournemouth Pier to Sandbanks and Poole
- Bournemouth waterfront: Pier and Square
- Clifftop and hotels: West Hill Road
- Westbourne side: Subway and West Cliff lines
- Boscombe-area nature: Branksome Chine
- Sandbanks beaches: Shore Road, Pavilion, and Peninsula
- Lilliput Village: small-town break
- Green space and recreation: Park Gates and Poole Park area
- Poole Quay and Old Town zone
- Harbour approach and paths: Baiter Park and Parkstone Railway
- Hillier coast views: Penn Hill and Westbourne return
- Timing and planning: how to ride smarter than just sitting
- Comfort, service, and the small details that shape your day
- Who should book this hop-on hop-off bus in Bournemouth?
- Should you book the City Sightseeing Bournemouth Hop-On Hop-Off Bus?
Key highlights that make this route worth your time
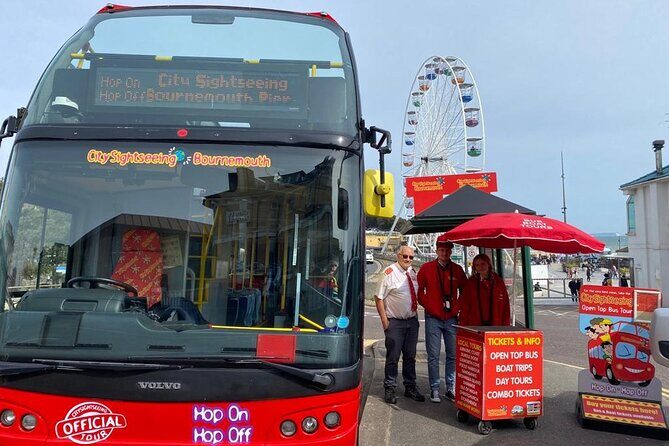
The top-deck view is the obvious win. If the weather is decent, sitting up top turns the whole ride into a moving postcard of Bournemouth’s shoreline.
You’re also getting a smart “two-city” feel. The route links Bournemouth’s most famous coast areas with Poole-side sights and the harbour atmosphere, which helps if you want more than just one beach town.
Still, you should know that commentary quality can vary. One review mentioned the return driver’s commentary was weak, so your experience may depend on which driver you get for a given loop.
5 key things you’ll notice right away
- Top-deck views from a red double-decker make the ride feel like part of the sightseeing
- Hop on, hop off at every stop keeps the tour flexible even if you want short detours
- 90 minutes for the full loop means you can do a quick orientation ride and then explore on foot
- Bournemouth Pier to Sandbanks to Poole areas covers a lot of coastline without changing hotels
- Buses run every 60 minutes so it helps to pick a couple of priorities per area
You can also read our reviews of more city tours in Bournemouth
How the pass works: 24 or 48 hours, every 60 minutes
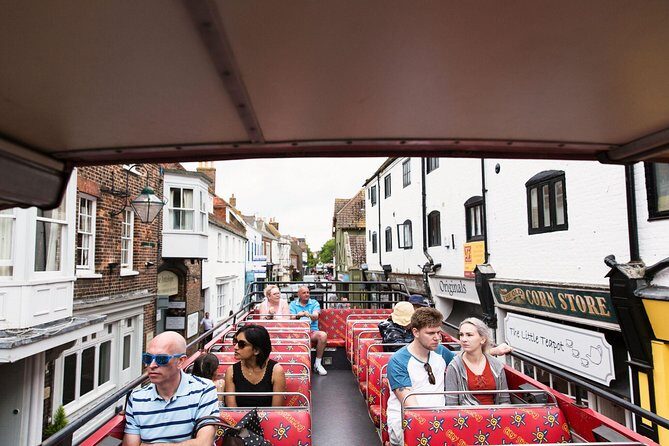
This is a classic hop-on hop-off setup with mobile tickets (and paper vouchers). Your pass is valid for 24 or 48 hours, and you can redeem it at the stops along the route.
The full loop takes about 90 minutes, and services run every 60 minutes. That matters because you shouldn’t think of it as a one-and-done bus. If you’re staying more than a day, the real value comes from doing one loop for orientation, then coming back later to spend time where you actually want it.
The bus tour is seasonal, typically operating May to September (dates can vary). If you’re traveling outside those months, you’ll want to confirm whether the service is running during your dates.
First ride tip: sit up top and let the audio guide you
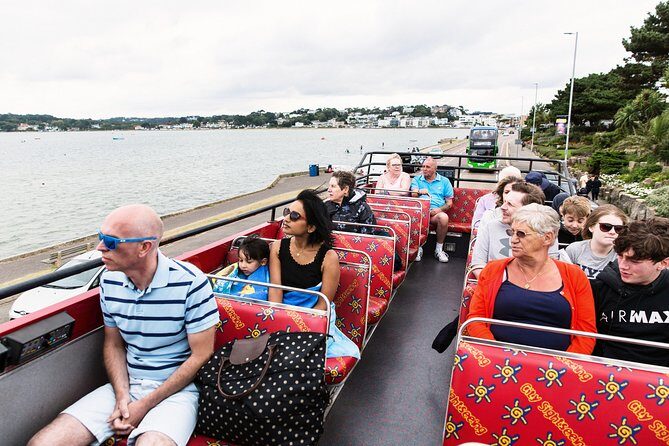
The bus is a red double-decker, and the driver starts from a conveniently located stop near town. When the weather cooperates, the top deck gives you the best angle for coastal views and photo stops.
On board, you’ll hear audio commentary in English. It’s not just background noise. It’s the difference between seeing coastline and understanding what you’re looking at—especially around key landmarks like Bournemouth’s pier area.
Also, keep an eye on how your voucher is handled. One review noted that vouchers are exchanged at the departure point rather than at a kiosk, so don’t wait around for a separate pickup location.
Price and value: what $23.43 buys you in practice
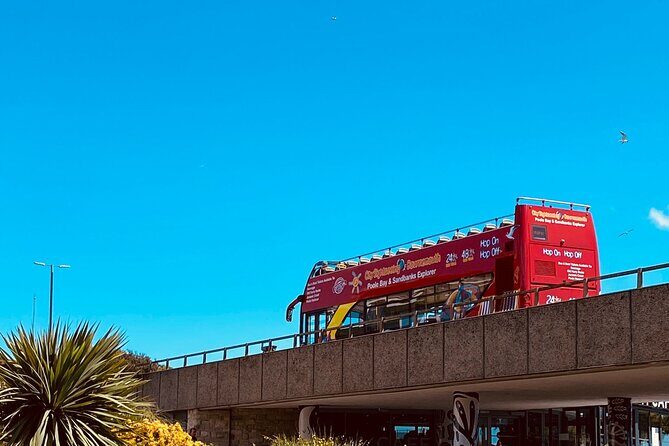
At about $23.43 per person, this tour can be a solid value—mainly because it saves time. You get:
- a 90-minute loop that shows you the main sights across Bournemouth and out toward Poole areas
- the chance to hop off and return later on the same pass
- audio guidance that helps you decide where you actually want to walk next
If you’re only in town for a short visit, it’s a quick way to connect beaches, promenade zones, and harbour-adjacent areas without getting lost. If you have more time, the 24/48-hour option turns it into a flexible “transport plus narration” plan.
Worth factoring in: attraction entry fees aren’t included, and food and drink aren’t included unless specified (nothing like that is listed here). So think of this as transportation and orientation, not a full day of paid attractions.
The route in detail: from Bournemouth Pier to Sandbanks and Poole
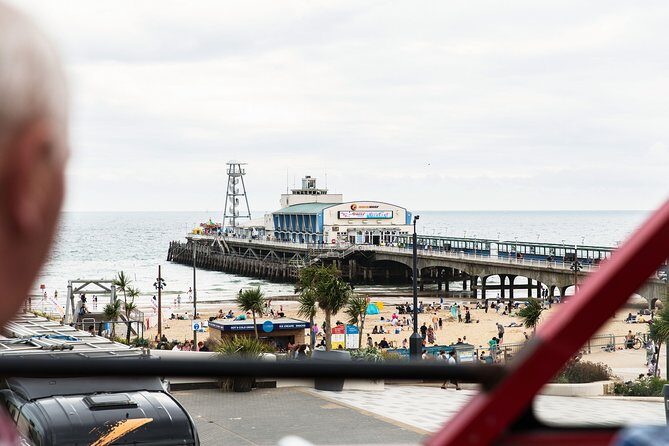
Below is what to expect as you roll through the key coastline sections. I’ll keep it practical: what each stop is good for, and where you might want to plan a hop-off.






Bournemouth waterfront: Pier and Square
Stop 1: Bournemouth Pier (Stand DD)
This is a strong starter stop. You’ll be near Bournemouth Pier (and the area behind Hot Rocks), which is ideal if you want seaside views right away. The pier area also has the Europe’s first synthetic surf reef, and you can browse souvenirs at The Square.
Stop 2: Bournemouth Square (Stand X)
This puts you back in the heart of Bournemouth’s core area, useful for resetting your plans. If you hopped off at the pier, this is a good place to walk around the town vibe before heading back to the coast again.
Clifftop and hotels: West Hill Road
Stop 3: West Hill Road (West Cliff Savoy Hotel)
This stop suits anyone who likes viewpoint streets and classic seaside architecture. It’s not just a transit point; it can work as a launch pad for an easy wander between hotel-area streets and higher ground views.
Westbourne side: Subway and West Cliff lines
Stop 4: Subway (Westbourne – Camden Bar)
This is a practical mid-route stop. It helps if you want to mix seaside with a more local-feeling neighbourhood walk, without committing to a long detour.
Boscombe-area nature: Branksome Chine
Stop 5: Branksome Chine (Branksome Chine)
This is one of the stops where the tour shifts from pure promenade to something greener and more scenic. It’s a good time to hop off if you want a break from the busiest sea-front feel.
Stop 6: Canford Cliffs (Canford Cliffs – Loch Fyne)
Canford Cliffs is all about that “coast that keeps going” feeling. It’s a helpful stop if you want to compare different beach stretches rather than sticking to just one.
Sandbanks beaches: Shore Road, Pavilion, and Peninsula
Stop 7: Shore Road (Sandbanks Beach: Shore Road)
This is the beach zone. If you’re chasing sand-and-sea time, this stop is the place to do it. It also gives you a clean segment to walk along the shoreline if you’ve got the energy.
Stop 8: 19 Banks Rd (Sandbanks Beach: Pavilion)
This keeps you close to the action near the Pavilion area. It’s convenient if you want easy access to the beach without trekking across Sandbanks.
Stop 9: Panorama Road (Sandbanks Peninsula – main road half way between Lovo Drinks & Haven Ferry Cafe)
This stop is your “views and strolling” option. Panorama Road sounds exactly like the kind of place where you’ll want to step off for a few minutes and take in the coastline angles.
Stop 10: Pavilion (Sandbanks Beach: opposite Pavilion)
Another strong beach access stop. It also works well if you hopped off earlier and now want a second reset without re-entering the coast from a less convenient corner.
Stop 11: 260–262 (Sandbanks Beach: opposite Shore Road)
This is for flexibility. If you want to spend more time near the Shore Road side, this stop helps you avoid awkward walking back from where you end up.
Lilliput Village: small-town break
Stop 12: Rockets and Rascals (Lilliput Village: Lilliput Square)
This stop reads like a chance to step away from the biggest seaside pockets. It’s great for a shorter town-break feel—especially if you’re traveling with kids.
Green space and recreation: Park Gates and Poole Park area
Stop 13: Park Gates (Whitecliff Recreation Ground)
Good for a break from pure streets and beach views. Recreation-ground areas are usually where you can stretch your legs and get some air between hops.
Stop 14: 3 Hosier’s Ln (Poole Park: Park Gates East)
This is another park-side access point. If you want a calmer pause than the harbour-front sections, this works well.
Poole Quay and Old Town zone
Stop 15: Poole Quay Hotel (Poole Quay & Old Town: Thistle Hotel)
This is one of the tour’s big payoffs. Poole Quay & Old Town is where the harbour energy kicks in, and it’s a sensible place to hop off for a longer walk. One review even called the Poole Harbour area the favourite part of the trip.
Harbour approach and paths: Baiter Park and Parkstone Railway
Stop 16: 106 Labrador Dr (Baiter Park)
If you like “harbour edges” and calmer scenery, Baiter Park is a nice match. It’s a natural stop for a slower wander rather than a quick photo moment.
Stop 17: Park Gates (Poole Park)
You can think of this as a second Poole Park entry point. It’s handy if you’re trying to align your hop-off with how long you want to linger in that park zone.
Stop 18: Parkstone Railway Station (Ashley Cross: Parkstone Railway Station)
This is a useful transit-friendly stop. It also helps if you want options for onward travel after your bus ride, since it’s tied to a railway station area.
Hillier coast views: Penn Hill and Westbourne return
Stop 19: Penn Hill Corner (Penn Hill)
This gives you a different side of the area as the route shifts back inland. It’s a good stop if you want to see the broader town layout, not just the waterline.
Stop 20: 126A Poole Rd (Westbourne)
Westbourne is your in-between choice: a slice of everyday town feel with easy access to keep building your itinerary without walking too far from the bus.
Stop 21: The Triangle (Stand A)
This is a practical navigation stop. Triangles and major junctions tend to be easier to re-find later, especially if you’re hopping off and on multiple times.
Stop 22: Exeter Road (Stand LL) (Bournemouth Square (Stand LL))
This is a return back toward central Bournemouth. It’s a good last stop if you want to end near town and head back to dinner, drinks, or your hotel.
Timing and planning: how to ride smarter than just sitting
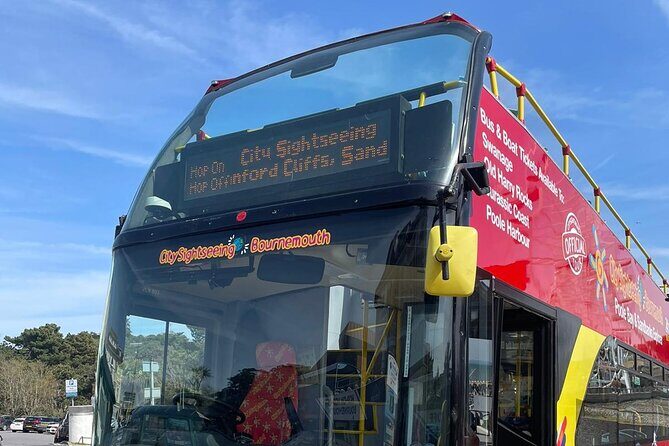
The bus starts running with the first tour at 10am and the last tour at 5pm. Since departures are every 60 minutes, I recommend you treat the loop like a moving map:
1) Do one full loop early to get oriented.
2) Pick 2–3 stops you actually want more time at.
3) Use the return trips during your 24 or 48 hours pass to turn stops into real plans.
Because it’s seasonal and runs from late spring into summer, you’ll also want to think about daylight and beach time. Early in the day gives you better odds of clear views for top deck viewing.
Finally, don’t overload your hops. With this many stops, it’s tempting to get off everywhere. A better approach is to decide what you care about most: pier area and town centre, beach stretch in Sandbanks, or harbour and Poole-side walking.
Comfort, service, and the small details that shape your day
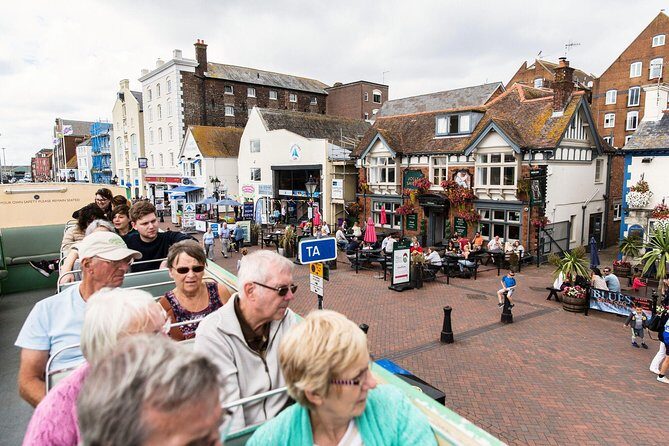
Buses are described as clean, comfortable, and well maintained. That matters because this is a sightseeing ride: you’ll likely spend time looking out the windows, so having a bus that feels fresh makes a difference.
The staff and drivers come up positively in reviews. Expect helpful, friendly drivers, and if you’re unsure about where to go, this is the kind of tour where asking questions on board can save you time.
For families, this tour works well. Kids tend to like being up top, and parents like that the route gives you an easy way to break up the day.
One more practical note: dogs are welcome as long as they’re well-behaved and kept on a lead.
Who should book this hop-on hop-off bus in Bournemouth?
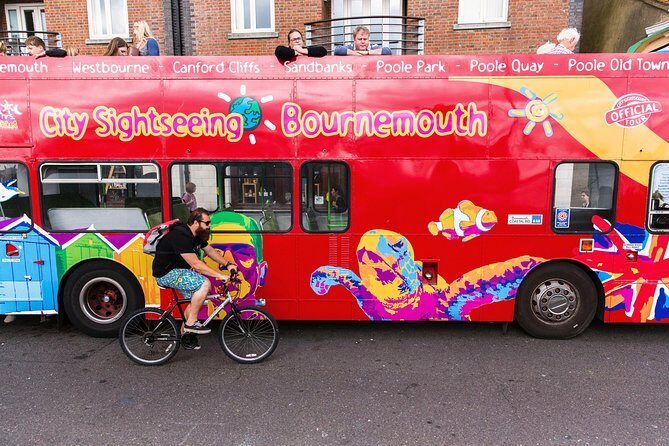
Book this if you want:
- a quick orientation to Bournemouth plus Poole-side areas
- a flexible plan where you can hop off for beaches, parks, and harbours
- audio commentary in English to add meaning to what you’re seeing
- an affordable way to cover a long stretch of coastline without constant backtracking
It may be less ideal if you hate waiting. Since buses run every 60 minutes, you’ll want to be comfortable with a timetable and not just “show up and go whenever.”
Also, if audio commentary quality matters a lot to you, know that there’s at least one report where the return commentary was disappointing. Most days are probably fine, but it’s a fair consideration.
Should you book the City Sightseeing Bournemouth Hop-On Hop-Off Bus?
I’d book it if you’re coming to Bournemouth for a short stay and you want to make your time count. The combination of easy hopping, top deck views, and English audio guidance turns the ride into a useful part of your vacation, not just transport.
Skip it only if you already know exactly where you want to walk and you’re staying in one tight area. In that case, you might spend less by using local buses or just walking between a few close points.
If you want a coast-to-harbour overview with room to change your mind on the fly, this is a straightforward, good-value way to do it.