REVIEW · BRISTOL
Bristol Harbourside Self-Guided Walking Tour
Book on Viator →Operated by Pandemic Tours · Bookable on Viator
Bristol’s docks tell stories on your feet. This self-guided walking tour in Bristol pairs a GPS route with an audio guide led by Helen, so you can explore at your own pace while learning how the harbourside evolved. Millennium Square starts you off with local river history, and the route keeps feeding you small, memorable details as you move along the water.
I like two things a lot. First, the narration isn’t a robotic voice; it’s Helen talking you through each area and what you’re seeing. Second, the stops are mostly short and practical, with many marked as free to enter (including M Shed), so you’re not constantly paying extra.
One possible drawback: navigation can be a bit tricky. If street names are unclear or access is blocked in places, the walk can run longer than you planned, and one reported experience said they gave up halfway. Build in extra time, and keep your phone screen handy so you can correct course early.
In This Review
- Key highlights worth your attention
- How this self-guided Harbourside walk actually feels
- Millennium Square and Canon’s Marsh: your first geography lesson
- Amphitheatre waterfront and the skateboarding clue you might otherwise miss
- Pero’s Bridge: the 1999 story and those horn sculptures
- The medieval harbour story near the river confluence fountains
- College Green: church, art, and the pause you’ll be glad you took
- King Street to Queen Square: from ship traffic to Georgian streets
- Welsh Back: name questions, and why the evening scene makes sense
- Castle Park and Bridge Quay: medieval Bristol lines up with today
- St Mary Redcliffe and the Redcliffe Caves: why this coast looks the way it does
- Bathurst Basin, Ostrich pub, and the dock changes you can feel
- Princes Wharf to Wapping Wharf: cargo today, work history behind it
- M Shed and the SS Great Britain finale you’ll remember
- Price and value: what $12.33 buys you in real time
- Navigation tips so your walk doesn’t run long
- Who should choose this Bristol Harbourside self-guided tour?
- Should you book it?
- FAQ
- How long does the Bristol Harbourside self-guided walking tour take?
- Is there an in-person guide during the tour?
- What language is the tour available in?
- Where does the tour start and where does it end?
- Is M Shed included, and is there a fee?
- Is this tour private for my group?
Key highlights worth your attention
- Helen’s audio guide keeps the story tied to what’s around you, stop by stop
- GPS map and directions make it easy to follow without an in-person guide
- Mostly free sights along the harbourside and city-centre stretch, including M Shed
- Short story stops (often 5–10 minutes) help you keep momentum and avoid fatigue
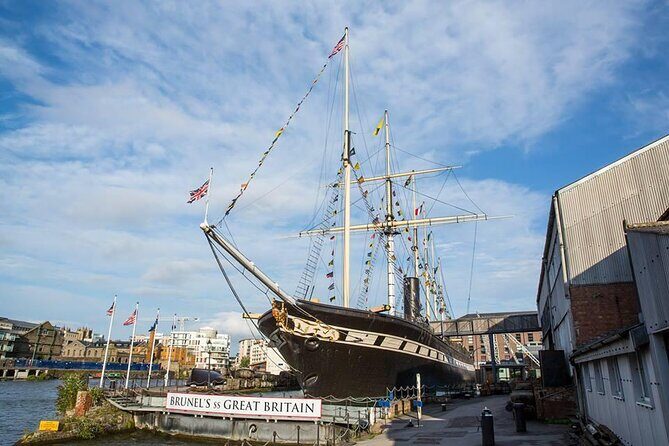
- Dockyard finale at Brunel’s SS Great Britain, with connections back to earlier Bristol exploration
How this self-guided Harbourside walk actually feels
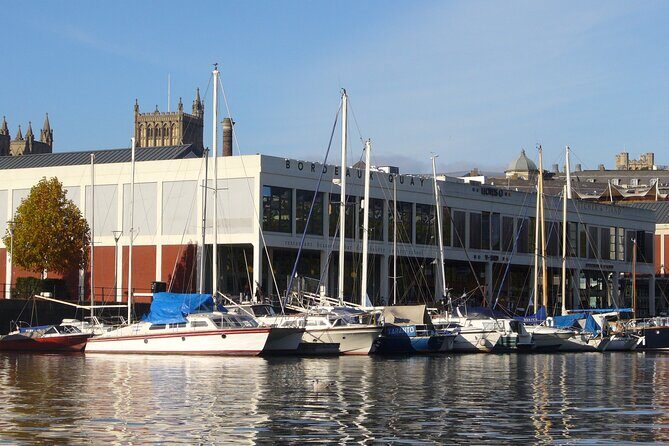
This tour is built for independent wandering with an audio brain in your pocket. You get map, directions, and a GPS route plus audio, videos, pictures, and recommendations to use along the way. It’s guided through audio rather than an in-person person, and Helen’s narration is the main “engine” of the experience.
Expect a pace that’s more like “read the city as you walk” than “race from landmark to landmark.” With a duration around 2 to 3 hours, the stops are timed so you can absorb stories without turning it into an all-day ordeal. Also, you have three weeks of unlimited access in the app, which means you can redo sections if you want extra photos or you missed a detail the first time.
Value-wise, the headline is simple: you’re paying about $12.33 per person for the walking plan and the audio-guided storytelling. Many stops are free or outside-facing, so your costs stay predictable. That’s a rare win in a waterfront city where paid attractions can quietly stack up.
You can also read our reviews of more walking tours in Bristol



Millennium Square and Canon’s Marsh: your first geography lesson
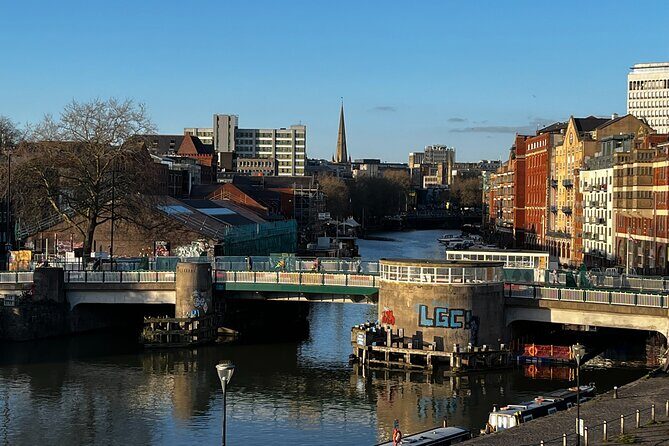
Your walk kicks off at Millennium Square, set on the former Canon’s Marsh. This is one of those “look around, then realize you’re standing on changed land” moments. The rivers Frome and Avon used to meet here, the area was marshy, and then it was drained and built over in the early 18th century.
Why this matters on a walking tour: you’ll start noticing how Bristol grew with the water. When the story begins at a place like this, the later dockyard sections make more sense. Even if you only catch a few seconds of it, you’re being trained to look for clues—river shape, building edges, and the city’s relationship to trade routes.
This first stop is quick (about 10 minutes), so it works well as a warm-up. If you’re prone to starting “tour mode” too slowly, you’ll appreciate how the pacing nudges you forward.
Amphitheatre waterfront and the skateboarding clue you might otherwise miss
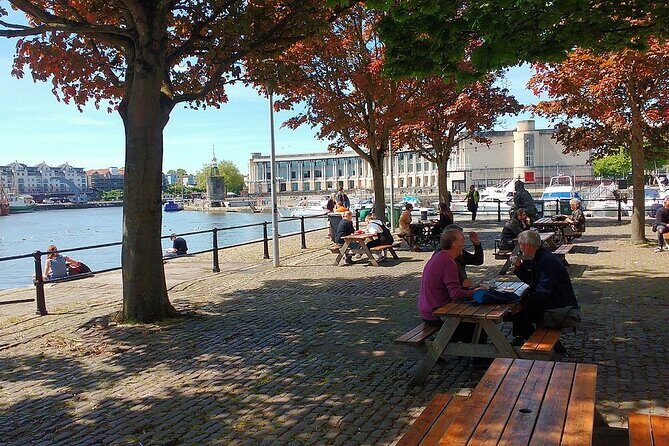
Next comes the Bristol Amphitheatre and Waterfront Square, a spot you might spot because it’s used hard by skateboarders. It’s one of those places where the city seems to have accepted that youth culture exists—and designed architecture accordingly. You may even see skateboarders at work, which makes the lesson feel real rather than textbook.
The payoff here is less about the amphitheatre itself and more about how the city handles public space. Some areas of Bristol discourage skateboarding, but here it’s part of the scene. When you learn that a city “chooses” where certain activities are allowed, you start seeing urban design choices more clearly as you walk.
The stop is short (about 5 minutes), so treat it like a snapshot: listen, glance around, then keep moving while your attention is still fresh.
Pero’s Bridge: the 1999 story and those horn sculptures
Pero’s Bridge opened in 1999, and it was named for a key local figure—but the hook is what you learn while you’re actually standing on/near the bridge. You’ll also get the reason behind the paired horn-shaped sculptures, which is the kind of detail you usually miss unless someone points it out.
This is exactly the kind of stop that makes a self-guided audio tour worth it. You’re not just looking at a bridge; you’re learning how and why it was designed. And since the stop is only around 5 minutes, it’s easy to fit in even if you stop for a photo or two.
Practical note: bridges can be windy, especially along the water. If your hair or scarf has opinions, plan for that and keep your phone secured.
The medieval harbour story near the river confluence fountains
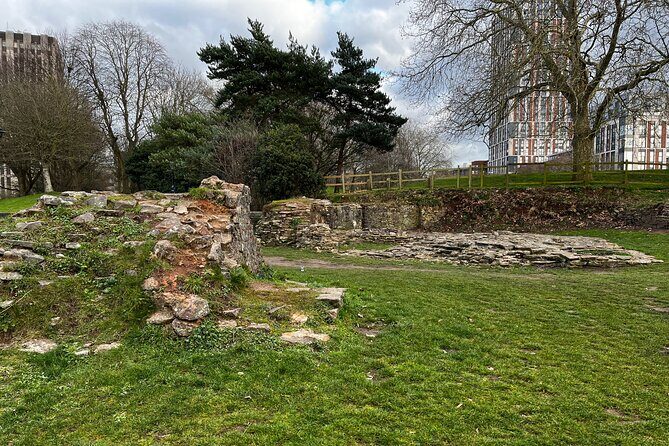
At this stage, you’ll hear how a harbour developed along the riverside during the Middle Ages at the confluence of the Avon and Frome. This was roughly where the current fountains are located, so it’s another “same area, totally different use” moment.
The story matters because it connects the dots between what Bristol does later (docks, shipbuilding, trade) and what it needed earlier (a workable waterfront where boats could load, unload, and shelter). It’s the kind of context that turns “pretty water” into “understandable history.”
This is also a nice buffer stop—short enough to keep moving, but meaningful enough to anchor the rest of the walk.
You can also read our reviews of more guided tours in Bristol




College Green: church, art, and the pause you’ll be glad you took
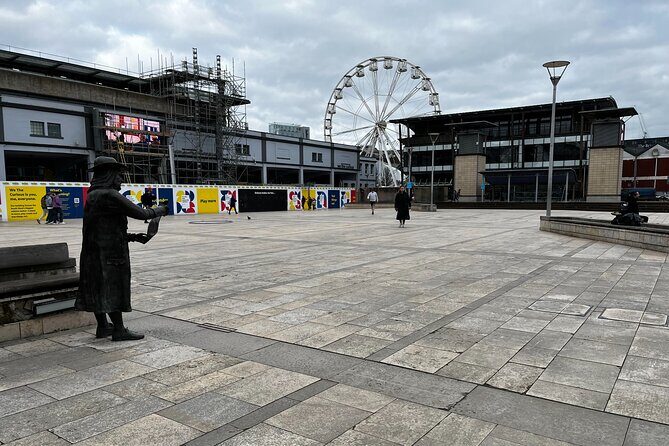
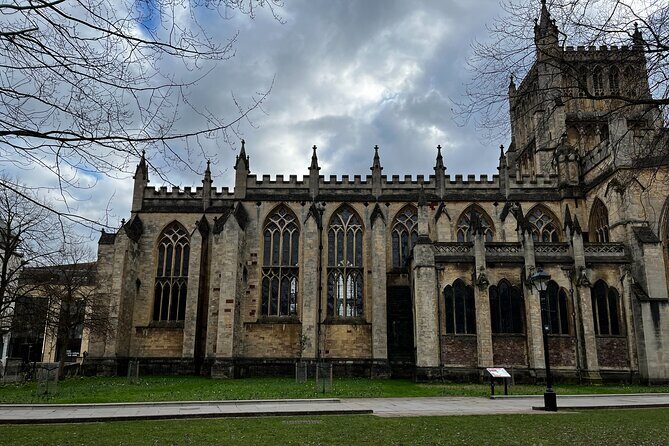
College Green is a popular gathering spot, and it’s a smart place to slow slightly. Here you’ll learn about an important church (called an Abbey), see references to works of art by an extremely famous artist, and hear about a chapel and a museum in the area.
Even without stepping inside, you’ll come away with a clearer picture of how the city’s civic and religious life overlapped with its public spaces. The “you can congregate here” angle is not just atmosphere—it’s a reminder that towns aren’t built from monuments alone. They form around places where people meet.
Plan about 15 minutes for this stop. It’s the longest city-centre moment you’ll hit before you slide back toward the harbourside vibe.
King Street to Queen Square: from ship traffic to Georgian streets
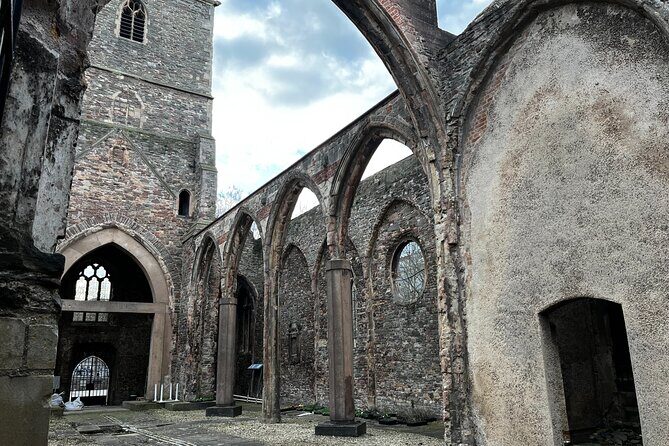
Then you move into the kind of street atmosphere Bristol does well: places that feel ordinary until you add the right story. King Street is described as a former busy corridor for ship captains, traders, and ship workers moving goods between boats and stores. That mental image does wonders for your understanding of why waterfront areas were so central to wealth and daily life.
From there, Queen Square takes you into Georgian form. This park sits with trees and cobbled streets around it, but it also has a hard-edged past: it was once marshland used for dumping rubbish and for weaponry practice. Houses began appearing from 1699, starting on the south side of the square.
That contrast—pretty urban geometry over a rough practical past—is the reason I like this part of the walk. It makes you question first impressions. It also helps you understand how quickly cities repurpose land as needs change.
Welsh Back: name questions, and why the evening scene makes sense
Welsh Back remains a busy area, especially in the evening, with bars and fine restaurants, some of which are on boats. You’ll also hear what the unusual name means and how it ties back to the area’s history.
This is one of those stops where the audio helps you read the “present” without forgetting the “past.” If you’re visiting after work hours, you’ll likely feel the energy instantly, and the explanation gives it context instead of letting it blur into generic nightlife.
The stop is around 10 minutes, which is perfect: enough time to listen, look, and snap a photo if you want—without turning the evening into a detour marathon.
Castle Park and Bridge Quay: medieval Bristol lines up with today
Castle Park is where you’re pointed toward the site of the old castle and Bristol’s medieval settlement. Even if the structures you see today aren’t the same ones that once ruled this spot, the location tells you why power clustered here.
Then you’ll arrive at Bridge Quay, which gives you a strong viewing moment. You get a view toward Bristol Bridge, with St Peter’s, St Nicholas’, and St Mary Le Port churches in the background. The story adds extra meaning: the Bristol Bridge area is believed to be where the settlement of Bristol began.
This is a great pair of stops because they guide your eyes. One teaches you “this is where the old core was,” and the other gives you “here’s the view that shows why that mattered.” Take a slow look both times. Even a few extra seconds can help you place the city like a map.
St Mary Redcliffe and the Redcliffe Caves: why this coast looks the way it does
St Mary Redcliffe Church is next, and the audio helps you understand why it looks like it does today. The church you see now isn’t the original. The earlier church from Henry I’s time fell into disrepair and was rebuilt in the 14th century.
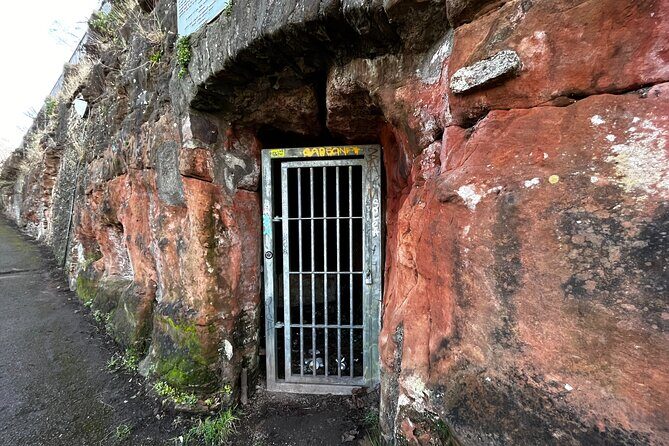
Then you’ll move toward Redcliffe Caves, where the name comes from bright red Triassic sandstone rocks. The homes along Redcliffe Wharf are built above a cave system that runs back toward St Mary Redcliffe church.
This part is especially valuable for a walking tour because the “why” is visible right in front of you. When the stone color and the cave system connect to the area’s buildings, you stop treating the city as scenery and start treating it like an engineered living record.
If you’re bringing kids or you’re short on energy, this is still workable because each element can be enjoyed at a glance. But for full effect, pause and look at how the wharf area sits above the underlying caves.
Bathurst Basin, Ostrich pub, and the dock changes you can feel
As you keep going, Bathurst Basin and the surrounding story explain how the area shifted. Bathurst Basin lost its water supply when the New Cut was dug out in 1809. And near the entrance sits the Ostrich pub, built around 1745, which would once have been used by sailors, dock workers, and merchants.
This is where the tour transitions from “pretty streets and churches” into “trade systems and working waterfront.” You’re learning that docks are not static. Waterways and routes change, and businesses adjust—or disappear.
It’s a good stop to use as a reality check about planning your route time. Dock areas can include uneven footing and open waterfront space, which can make a few extra minutes feel longer.
Princes Wharf to Wapping Wharf: cargo today, work history behind it
Princes Wharf shows you a dock world that’s less cargo and more memory. Most of the city docks are now closed to cargo ships, so the waterfront is different from its peak trading days. If you look closely enough, you can find evidence of what dock life was like.
Then Wapping Wharf brings you to shipbuilding and repair. In the 1800s, Bristol Docks would have been packed with boats loading and unloading goods. Even without stepping into a workshop, that description helps you picture the noise, schedules, and movement that once defined this stretch.
These two stops are short (around 5–10 minutes), but they do an important job: they keep the tour from being only architecture and viewpoints. You get the working side of the story too.
M Shed and the SS Great Britain finale you’ll remember
Your final stretch is where the tour earns its keep. You’ll connect Bristol’s dockyard identity to major maritime moments and then end at Brunel’s SS Great Britain.
Along the way:
- You’ll hear about the Matthew of Bristol, a replica of the original ship John Cabot sailed in 1497. The replica later sailed across the Atlantic to Canada in 1997 to mark the 500th anniversary of Cabot’s journey.
- You’ll reach M Shed, which is free to enter and is described as one of the few harbourside parts that retains original features. If you have time, this is where you can turn your walking knowledge into something you can explore longer.
- You’ll get the big engineering story of the SS Great Britain: built by Isambard Kingdom Brunel, described as the largest ever at the time and the first ship constructed using iron. When it launched in 1843, it was said to be the greatest experiment since the creation.
If you only do one thing at the end, do not rush through the SS Great Britain moment. This is the payoff that ties modern Bristol identity to the centuries-long push for innovation and trade. It’s also a natural place to wrap up and wander using the tour’s recommendations.
Price and value: what $12.33 buys you in real time
At about $12.33 per person, you’re paying for three big things: the audio narration, the GPS-guided route, and access for re-listening. The unlimited access for three weeks matters more than it sounds. If you want to redo the walk when daylight is better, or you need to pause and step back to take notes, you can.
Most stops are free or outside-focused, including a clearly stated highlight that M Shed is free to enter. That means your spending stays mostly capped by the tour cost rather than stacking entry fees across the city.
The risk side is navigation quality. If you’re relying on the route to be perfect down to each turn, Bristol can challenge that. Roads change, construction happens, and sometimes access blocks can appear. If you’re the type who hates being detoured, bring patience and a little flexibility.
Navigation tips so your walk doesn’t run long
Since you’re self-guided, your best friend is your phone setup. Before you start, make sure the route is visible and that you can follow it without constantly unlocking your screen.
Also, use the stops as anchors. If the audio story is tied to where you are, you can confirm you’re in the right area even if a turn-by-turn instruction is slightly off. This helps when a street name isn’t clear or when the route needs a detour.
Finally, give yourself a buffer. The planned duration is about 2 to 3 hours, but a detour can add time. That matters most if you’re pairing this with dinner plans near the waterfront.
Who should choose this Bristol Harbourside self-guided tour?
This tour works best for people who like to learn on the move but don’t want to manage a group schedule. I’d recommend it if you’re:
- Comfortable walking for a couple of hours in a city area
- Interested in maritime Bristol and how the waterfront shaped the city
- Happy using your phone for GPS and audio rather than getting live guidance
- Visiting in a flexible window, since the hours listed run all day (Mon–Sun 12:00 AM to 11:30 PM)
It’s also a solid choice if you want free-to-enter stops and you’d rather spend money on a meal or transit than tickets. The audio guide language is English, and the experience is marked as suitable for most travelers, with service animals allowed.
Should you book it?
I think this is a good booking if you want a guided-by-a-person feel—without the expense of an in-person guide. Helen’s narration, the GPS route, and the mix of church, squares, and dockyard engineering stories create a complete sense of place, especially if this is your first time exploring Bristol’s harbourside area.
Skip it (or plan extra time) if you’re the kind of traveler who needs pinpoint turn-by-turn guidance with fully named streets every step of the way. Bristol’s layout and occasional access issues can throw off routes, and that can turn a 2–3 hour walk into a longer day.
If you’re flexible, curious, and ready to let the waterfront explain itself, this is one of those “worth it, even if you just do part of it” city walks.
FAQ
How long does the Bristol Harbourside self-guided walking tour take?
It’s listed as about 2 to 3 hours.
Is there an in-person guide during the tour?
No. Helen provides the audio guidance, and the experience is self-guided.
What language is the tour available in?
The tour is offered in English.
Where does the tour start and where does it end?
It starts at the Bristol meeting point given by a plus code, and it ends at Brunel’s SS Great Britain on Great Western Dockyard, Gas Ferry Rd, Bristol BS1 6TY.
Is M Shed included, and is there a fee?
M Shed is free to enter, and it’s included as part of the harbourside route.
Is this tour private for my group?
Yes. Only your group participates.