REVIEW · LONDON
Private Tour: Night Photography Tour in London
Book on Viator →Operated by London Photo Tours and Workshops · Bookable on Viator
Night London becomes your photo classroom. This private tour keeps you on the best lit angles of the Thames while a professional fine art photographer teaches night techniques you can use right away. I like that the instruction is geared to the camera you own, and I like the smooth route that helps you focus on shooting instead of wandering. One possible drawback: there are no refreshments, so you’ll want to plan ahead and keep a charged battery and spare memory ready.
The payoff is practical. You’ll work through iconic scenes—Big Ben, the London Eye, Westminster, and river reflections—then learn how to turn low light into clean photos with intentional long exposures. I also like that you can bring a compact, mirrorless, or DSLR and still get useful direction for your settings. Just note: night photography rewards patience, so expect to experiment with exposure times and keep moving at a leisurely walking pace.
In This Review
- Key Highlights Worth Your Time
- How This Private Night Photo Walk Actually Feels
- South Bank and the London Eye: Learn Night Settings on a Moving Stage
- Jubilee Bridge and Thames River: River Reflections and Long-Exposure Texture
- Royal Festival Hall to Big Ben: Freezing Action and Composing Big Icons
- Houses of Parliament and Westminster Bridge: History, Traffic Trails, and Clean Framing
- Victoria Embankment: Finish with Color, Reflection, and a Full London Eye View
- What You’ll Learn That Actually Shows Up in Your Photos
- Price and Value: What $337.60 Per Person Gets You in London
- Who Should Book This (and Who Might Want Something Else)
- Quick Tips Before You Go
- Should You Book This Night Photography Tour?
- FAQ
- FAQ
- How long is the Night Photography Tour in London?
- What does the tour cost per person?
- Is this a private tour?
- What cameras is the tour suitable for?
- Do I need to bring my own camera?
- Is a tripod recommended?
- Where does the tour start and end?
- Does the tour run in bad weather?
- Is there free cancellation?
Key Highlights Worth Your Time
- Private, tailored coaching based on your camera and your goals
- Pro instruction at every stop, not a one-size demo
- Slow exposures for skyline and the London Eye (with guidance on exposure times)
- Reflections and light trails along the Thames and Westminster Bridge
- Hands-on composition help from specific vantage points, including elevated bridge views
- Review of your shots and tips for how to keep improving after the tour
How This Private Night Photo Walk Actually Feels
This is not a quick sightseeing loop where you hold up your camera and hope. The rhythm is more like: stop, set up, shoot, adjust, and learn. The photographer’s main job is to help you make better night images with the tools in your hands.
Because it’s a private tour, the teaching can stay focused. You’ll be walking a leisurely pace along the South Bank area and then across to Westminster landmarks. That matters at night, when it’s easy to get turned around and waste time fumbling with settings.
The tour is designed for all-weather conditions, so you should dress for London evenings and be ready for occasional damp air and cold wind. You’ll also need to show up with a fully charged battery (and a spare is a smart idea). A tripod is strongly recommended for sharper long-exposure results—if you want one, you can arrange rental after booking.
You can also read our reviews of more private tours in London
South Bank and the London Eye: Learn Night Settings on a Moving Stage
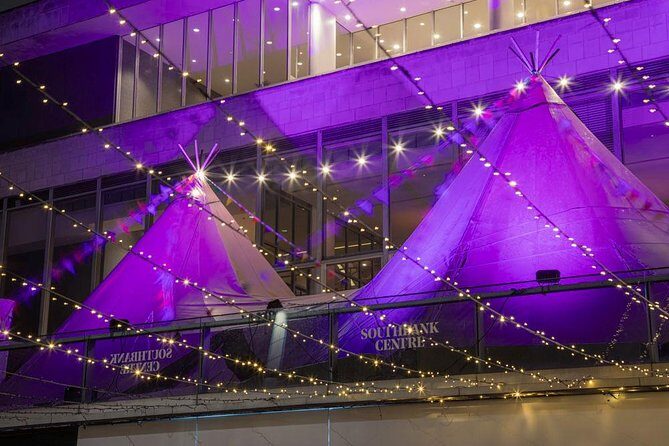
Your tour starts at the London Eye Waterloo Pier. From there, you’ll spend the first stretch at the South Bank, a classic place to photograph Big Ben, the Houses of Parliament, and the London Eye as the evening skyline settles in.
This is where the teaching is most valuable if you’re new to night work. The photographer helps you build a plan for your shot: where to stand, what to include, and how to set your camera for night luminosity. South Bank is also ideal because you’re surrounded by recognizable architecture and water-based light sources, which makes it easier to understand what changes when you alter shutter speed and framing.
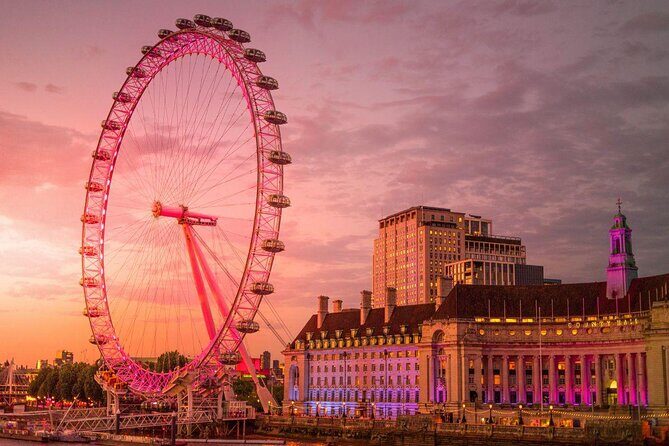
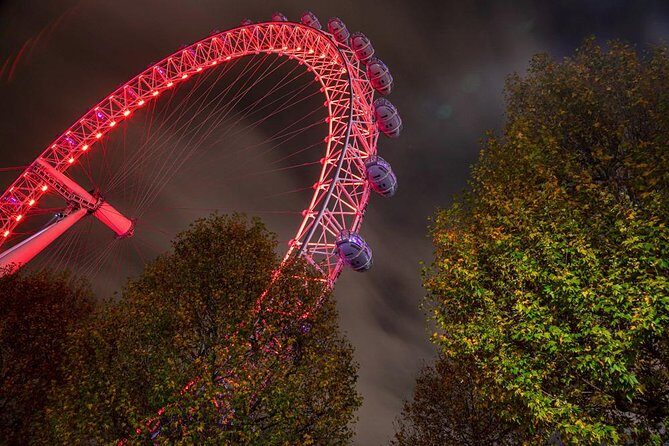
After South Bank, you’ll head to the London Eye area for a dedicated focus on capturing the structure as it rotates. The key night lesson here is slow exposure. You’ll learn how to set your camera for longer shutter times so the Eye comes alive instead of turning into a flat, overly sharp blob of LEDs.
You’ll also experiment with different exposure times to see how your photos change. That trial-and-error is the fastest way to learn at night. If you’re visiting in warmer summer months, the tour specifically mentions blue hour and twilight conditions as part of what you can shoot—great timing for color-rich skies and softer contrast.
Practical note: plan to hold your stance while you adjust settings. Even when the London Eye looks steady to your eye, your long exposures will reveal motion and light changes that you can use intentionally.
Jubilee Bridge and Thames River: River Reflections and Long-Exposure Texture
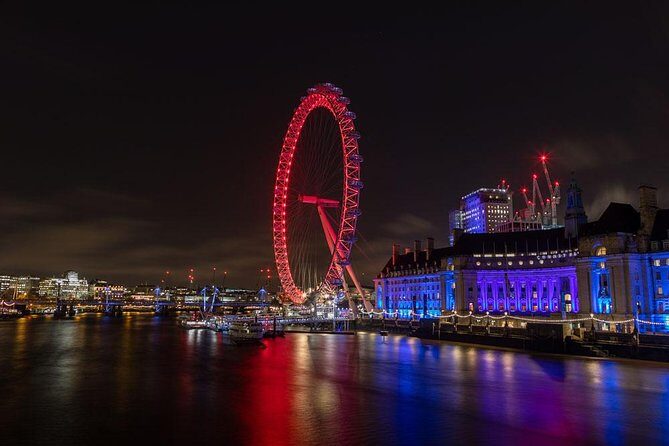
Next comes the Thames River segment, moving toward Jubilee Bridge for views of the river and Westminster. This portion shifts the focus from pure landmark shooting to what the river does to light—reflections, color, and smooth water surfaces.
You’ll photograph illuminated buildings like the Royal Festival Hall, National Theatre, and the British Film Institute as they glow at night. The teaching goal here is understanding reflections and learning how to use long exposures to make the water look more glass-like. That’s one of those night photography skills that instantly upgrades your results, even if your camera is basic.
At the Golden Jubilee Bridges viewpoint, you’ll get a slightly higher angle for framing and composition. From up there, you can work on relationships between landmarks—Westminster, the Houses of Parliament, the London Eye, Big Ben, and St Paul’s Cathedral all appear in a more layered way.
This stop is short, but that’s the point. The photographer helps you get set up quickly, choose an angle, and frame intentionally instead of shooting random compositions. If you’ve ever felt overwhelmed at night—too many lights, too many choices—this part helps you narrow down to one or two strong shots.
Royal Festival Hall to Big Ben: Freezing Action and Composing Big Icons
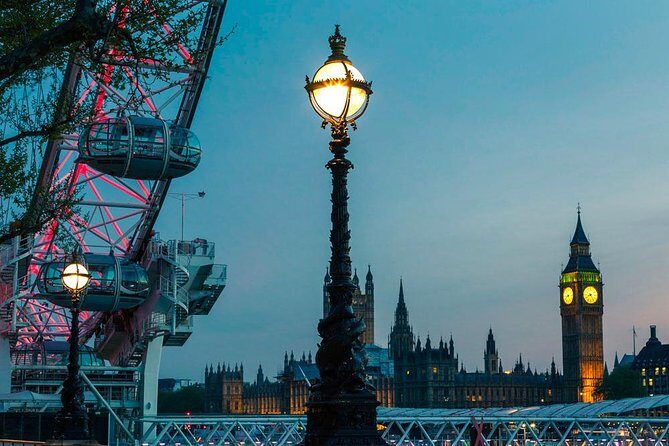
From the bridge area, you’ll move to Royal Festival Hall, where the camera lessons get more dynamic. You’ll photograph the activity in the nearby skateboard park area. The teaching focus is on freezing action while also using night settings that keep your images usable.
This is one reason the tour can feel different from typical night skyline walks. It’s not only about making pretty long exposures. You’ll also learn how to handle moving subjects and how to create atmospheric slow exposures when that’s what the scene needs.
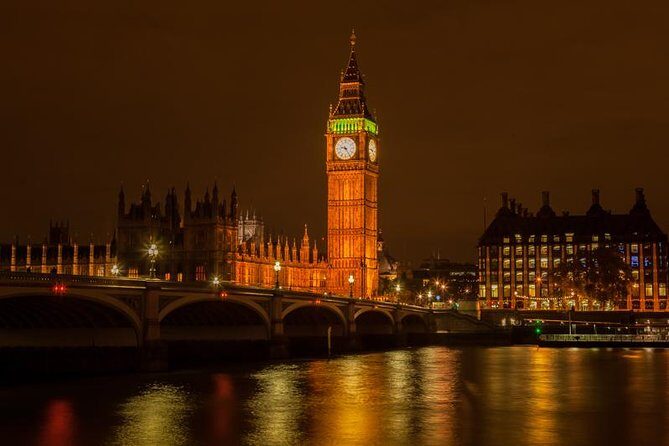
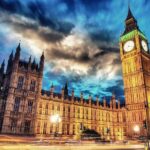
After that, you’ll head to Big Ben for shooting across the river. This stop is all about mood and composition. Big Ben is dramatic, but at night it can be easy to overexpose the brightest areas or misplace the framing so the building looks cut off or flat.
The photographer guides you on how to compose the scene so the historic details still feel solid, while the night ambiance stays present. It’s a good place to practice what you learned earlier about adjusting exposure to control brightness and keep light from washing out your image.
Houses of Parliament and Westminster Bridge: History, Traffic Trails, and Clean Framing
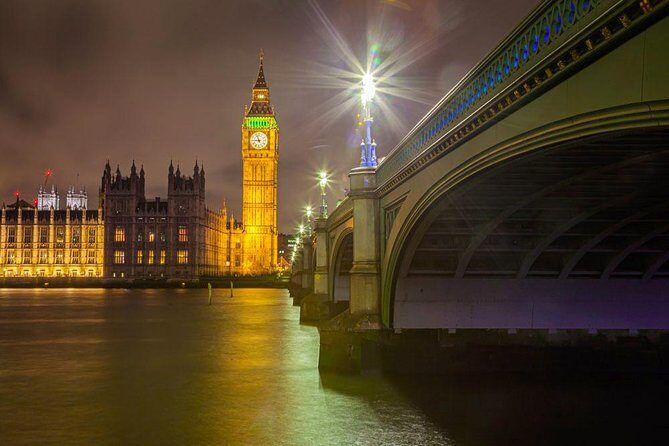
The Houses of Parliament stop is focused on making your photo feel like more than a postcard. You’ll learn how to integrate the building’s historical significance with contemporary London elements in the frame.
That sounds poetic, but it’s practical. The instruction helps you decide what’s important in the composition: how much sky to include, where the river or lights should sit, and how to avoid clutter so the landmark reads clearly.
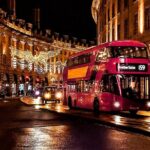
Then comes Westminster Bridge, one of the best spots on a night tour for learning light trails. Here, you’ll experiment with slow shutter speeds to capture flowing trails from moving traffic. This is a classic technique, but the value is in doing it with guidance for your camera settings.
If you’re using a tripod, this stop is where it pays off. You’ll have time to adjust the camera, lock in your framing, and then shoot while traffic creates the motion. If you’re shooting handheld, you’ll still learn how shutter speed affects streaking and sharpness.
The goal is confidence. By the end of Westminster Bridge, you should understand how to choose a shutter speed that creates trails without turning the scene into a smeary mess.
You can also read our reviews of more evening experiences in London

Victoria Embankment: Finish with Color, Reflection, and a Full London Eye View
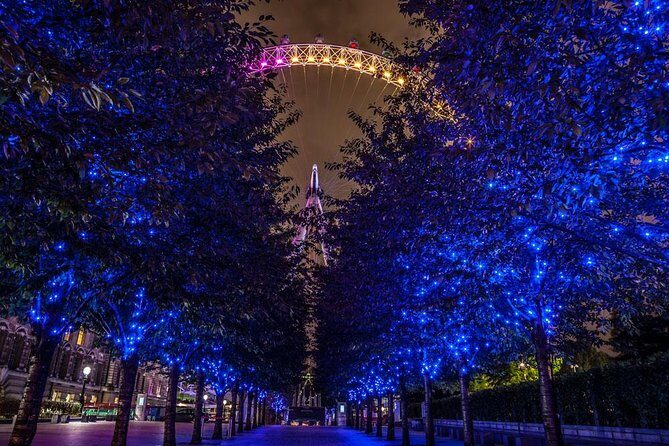
To wrap things up, you’ll reach Victoria Embankment for more river-level shooting. One key shot here is the London Eye from across the water, framed as a full circular experience instead of a partial skyline accent.
This stop is a great opportunity to refine what you started earlier. You’ll learn how to use light and color in your photographs, and you’ll practice slow exposures that suggest movement without losing the landmarks.
Victoria Embankment also emphasizes reflections. When the water is smooth and the lights are strong, you can get compositions that feel cinematic even if you’re just working with a standard camera. The photographer helps you with framing and composition so you’re not just shooting at random points along the river.
At this stage, it can help to think like a director: What should be sharp? What can be soft? What part of the scene is the star?
What You’ll Learn That Actually Shows Up in Your Photos
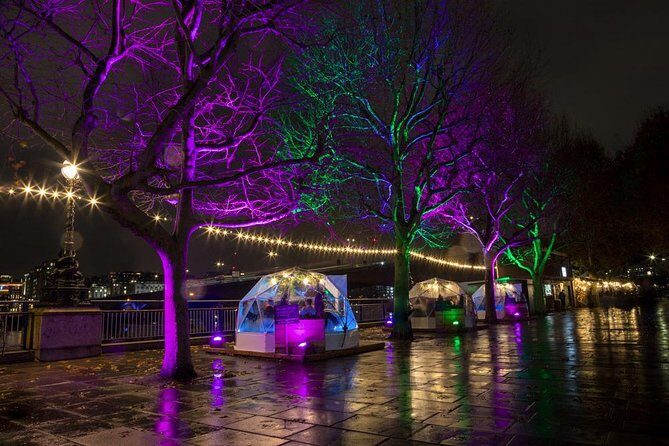
This tour is built around a few repeatable night skills. The exact settings will vary by camera, but the photographer’s method stays consistent: you learn what the control does, then apply it immediately to a real London scene.
Expect to work on:
- Exposure time control so the London Eye and moving light sources look intentional
- Framing and composition from multiple viewpoints so landmarks sit properly in the frame
- Light and color usage at night, including how the sky and reflections change your results
- Long exposure water effects to make the Thames look smoother and more layered
- Traffic light trails from Westminster Bridge to turn motion into design
- Action handling in the Royal Festival Hall area, including freezing movement at night
One of the most praised parts of this experience is the instruction style. Many guests describe the guide as calm, patient, and very good at adjusting settings for different camera types. If you’ve felt frustrated by night photography because Auto mode gives bland results, this tour is the antidote: you’ll understand why images look a certain way and how to fix them.
Also included is a review of your photographs and guidance on how to keep developing your skills after you leave. That’s a meaningful add-on. Night photography improves fast when you see what you did right and what you should change next time.
Price and Value: What $337.60 Per Person Gets You in London
At $337.60 per person for about three hours, this isn’t the cheapest way to photograph London at night. But it can be good value if you care about getting more than just “I was there” photos.
Here’s why the price can make sense:
- It’s a private experience, so you’re not competing for attention
- Coaching is focused on your camera and what you want to shoot
- You get hands-on instruction at multiple landmark stops, not one demo spot
- There’s a photograph review component, which helps you progress faster
The tour also tends to be booked well in advance (on average, about four months out). That’s usually a sign that people find the teaching worth repeating, especially during peak seasons when night skies and river reflections are at their best.
If you’re comfortable photographing at night already and want only stunning skylines, you might prefer a self-guided plan. If you want the fastest path to better night images, a pro working with you in real time is the shortcut.
Who Should Book This (and Who Might Want Something Else)
This tour fits best if you’re serious about night photography and want to learn techniques that transfer to other cities. It’s suitable for all camera types, from compact to DSLR, and for all skill levels—though it will be most rewarding if you’re willing to experiment with settings.
If you’re an absolute beginner, you’ll still benefit, but don’t treat this like a magic wand. You’ll get better most quickly if you’re ready to stop shooting in Auto and actually work with shutter speed and composition.
It’s also a strong choice if you’re traveling solo or as a pair because it stays private to your group. And the route is practical: the stops are concentrated around the South Bank and Westminster area, and the tour ends near Westminster Tube Station, which is helpful when you still want to enjoy the rest of your evening.
Quick Tips Before You Go
These are small steps that make the tour go smoother:
- Bring your camera with a fully charged battery and extra memory cards
- Consider renting a tripod if you want the cleanest long exposures
- Dress for cold, wind, and damp weather
- Think about what you want most: skyline shots, water reflections, or light trails
One more thing: keep your expectations realistic. London at night is gorgeous, but the images you want usually require testing exposure times, not instant perfection.
Should You Book This Night Photography Tour?
I’d book it if you want a structured way to learn night photography in one of the most photo-friendly cities on earth. The private instruction, the focus on practical settings, and the multiple landmark scenes make it ideal for getting your skills moving forward quickly.
Skip it (or consider a different format) if you only want casual photos with minimal camera interaction. This experience rewards effort: you’ll be adjusting, experimenting, and learning as you go.
FAQ
FAQ
How long is the Night Photography Tour in London?
The tour runs for about 3 hours.
What does the tour cost per person?
The price is listed as $337.60 per person.
Is this a private tour?
Yes. It’s a private tour exclusive to your group.
What cameras is the tour suitable for?
It’s suitable for all types of cameras, from compact to DSLR, and for all skill levels.
Do I need to bring my own camera?
Yes, you should bring your own camera, and it should have a fully charged battery (and/or a spare battery).
Is a tripod recommended?
A tripod is recommended for night photography. Tripod rental is available if you contact after booking.
Where does the tour start and end?
It starts at London Eye Waterloo Pier (London 1SW1A 1AE) and ends near Westminster Tube Station (Bridge St, London SW1A 2JR).
Does the tour run in bad weather?
Yes, it operates in all weather conditions, so dress appropriately.
Is there free cancellation?
Free cancellation is available. You can cancel up to 24 hours in advance for a full refund.