REVIEW · LONDON
Private Tour: Photography Walking Tour from Trafalgar Square to Covent Garden
Book on Viator →Operated by London Photo Tours and Workshops · Bookable on Viator
London turns into a camera classroom on foot.
What I love here is the private, teach-as-you-shoot coaching and the hands-on photo review while you’re still out taking pictures. The only real catch: you’ll want a fully charged camera (and ideally extra memory cards) because this is built for shooting, not just sightseeing.
You’ll move through some of London’s most photogenic zones—statues, street performers, classic architecture, and that unmistakable Chinatown color—so your learning happens where the light and the scenes actually change. It’s also a smart first taste of the city if you’re new, because you get a guided route with practical photo lessons mixed in.
And for your comfort and focus, the tour is private to your party, so you can ask questions instead of competing with a big crowd. At $347.77 per person for about four hours, it’s not a cheap outing—but the combination of camera coaching plus on-the-spot critique can make it feel like a small, focused workshop.
In This Review
- Key highlights to look for
- Trafalgar Square first: aperture, depth of field, and London’s big symbols
- Leicester Square: shaping portraits and angles around famous faces
- Chinatown gate to side streets: mastering color and depth without over-editing
- Covent Garden to Royal Opera House zone: shutter speed and focus modes for action
- Neal’s Yard: composition and framing in a small, colorful courtyard
- What the private coaching + photo review actually gives you
- Price and value: $347.77 for a mini photo workshop on streets
- Who should book this tour (and who may want a different option)
- Quick practical tips before you go
- Should you book this photography walking tour from Trafalgar Square to Covent Garden?
- FAQ
- How long is the photography walking tour?
- What is the price per person?
- Is this tour private?
- Is the tour suitable for beginners and all digital cameras?
- What should I bring?
- Where does the tour start and end?
Key highlights to look for
- Coaching tailored to your camera and skill level, including helpful guidance for beginners
- Real-time instruction on aperture, depth of field, light, composition, and framing
- A working photo break where you review what you’ve shot and get next-step advice
- Lots of subject variety: monuments, portraits, gates, architecture, courtyards, and street entertainers
- Photo tips for modern gear too, since it works with digital cameras and smartphones
Trafalgar Square first: aperture, depth of field, and London’s big symbols
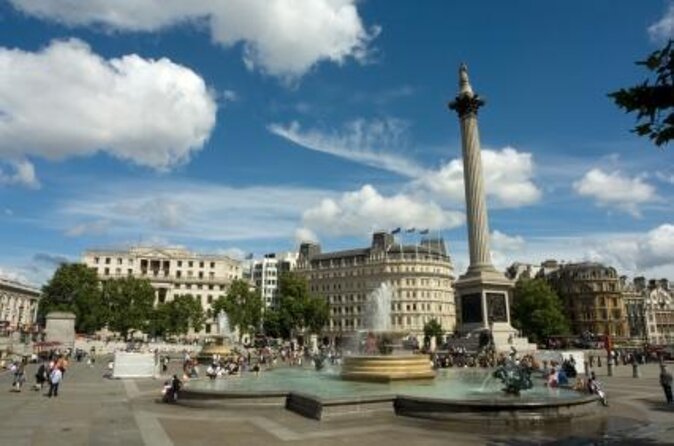
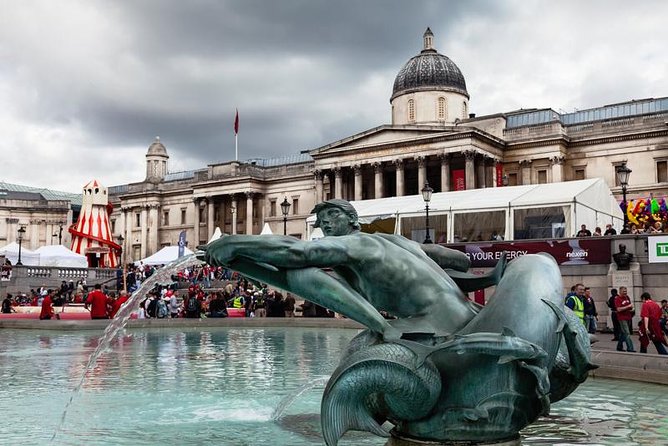
You start near Charing Cross Strand, and before you even settle into the walk, you’ll be shooting at Trafalgar Square, one of London’s clearest “start here” landmarks. Expect the National Gallery area, the iconic fountains, and plenty of monuments and statues to frame. The square also gives you a steady mix of close details and wide views—perfect for learning how perspective changes a photo.
This first stretch is where the tour turns tourist mode into photographer mode. You’ll practice ideas like aperture and depth of field, and the guide points out how light affects what works. In a place full of dramatic stone, bright signage, and moving street artists, you can learn quickly what to do when contrast is high or when there’s a lot going on.
One extra plus: street entertainers and chalk artists around the square give you a practical chance to photograph motion and texture without needing to travel anywhere “off the map.” The time here is about 45 minutes, so it’s enough to test settings and still keep momentum.
Quick consideration: if your camera menu system feels intimidating, start by being ready to follow along. This tour works best when you’re willing to make changes and test them right away.
You can also read our reviews of more tours and experiences in London.

Leicester Square: shaping portraits and angles around famous faces
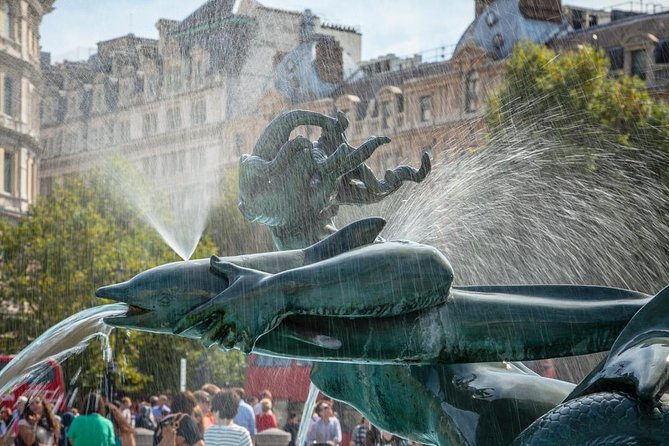
Next comes Leicester Square. At a leisurely walking pace, you’ll photograph the gardens and fountains, plus the big, dominant Shakespeare statue that many people rush past. Here’s the point: you’re not just capturing a famous figure—you’re learning how to make that figure look dimensional using angles and focus choices.
This stop is a good place to practice portraits and the technical side of making them work. The guide focuses on how aperture values and depth of field help you separate a subject from a busy background. There’s also a portrait opportunity with Charlie Chaplin’s presence in the area, so you can compare how your framing and settings change depending on what the scene gives you.
You’ll also experiment with different angles of view, which matters because Leicester Square can feel visually crowded. Small shifts—standing a little left, lowering your viewpoint, or stepping closer to reduce background clutter—often make the difference between a photo that looks touristy and one that looks intentional.
About 45 minutes here keeps you moving, but it’s also long enough to get a few “keepers,” especially if you’re using a phone or compact camera and need time to learn what each control does in real lighting.
Chinatown gate to side streets: mastering color and depth without over-editing
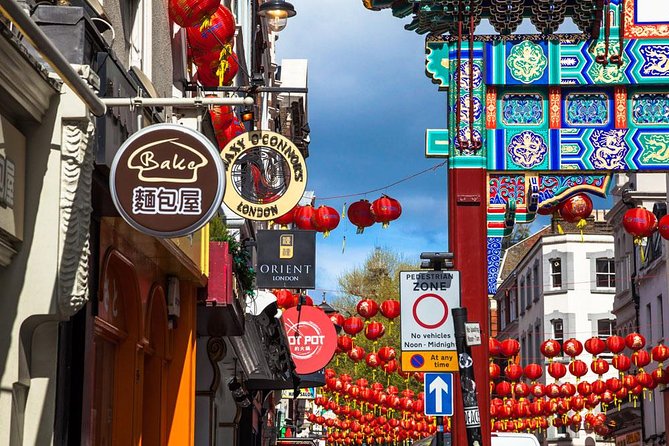
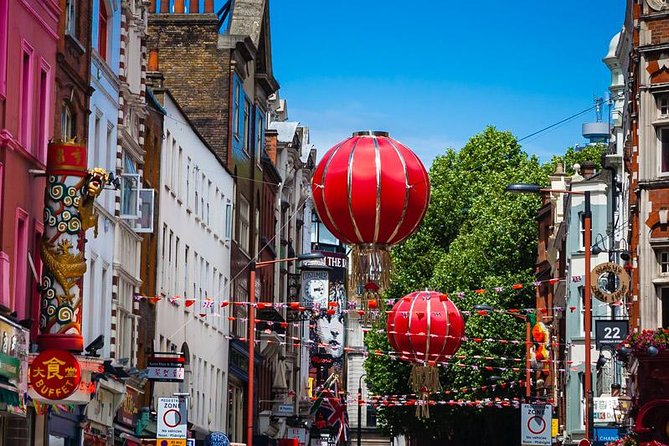
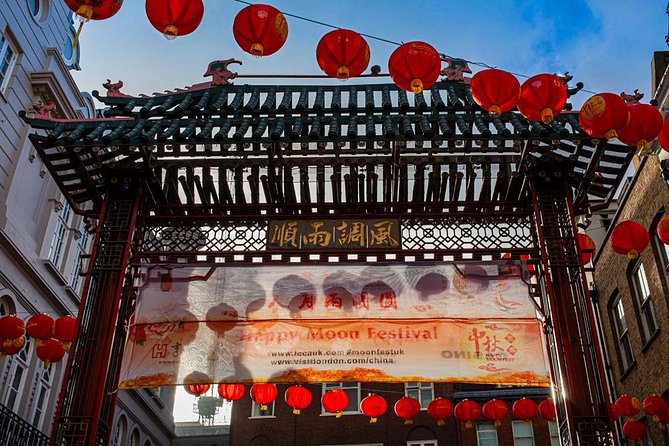
Then you head into Chinatown, where the photo opportunities get more immediate. The entrance gate alone is a strong shot: bold shape, strong lines, and enough visual detail to make framing interesting. After that, the guide helps you find the best viewpoints to capture Chinatown’s colorful storefronts, lanterns, and the dense, lively feel of the area.
This is where the learning shifts from technical settings to visual storytelling. You’ll work on how to use color effectively and how depth of field can separate subjects—like making a bright shopfront pop while keeping background elements softer. It’s the kind of guidance that helps your photos look less like snapshots and more like you planned the image.
And you don’t just stick to the main stretch. You’ll explore small side streets too, which is the difference between “I photographed Chinatown” and “I photographed Chinatown the way it looks on the ground.” Those tight lanes and storefront variety are great for practicing composition: what you include, what you leave out, and how close you get.
Chinatown gets about an hour, which is a comfortable amount of time to both experiment and slow down enough to notice details.
Small practical note: more color often means more choices for your camera (and your brain). Bring your patience. You’ll likely take a lot more photos than you planned.
Covent Garden to Royal Opera House zone: shutter speed and focus modes for action

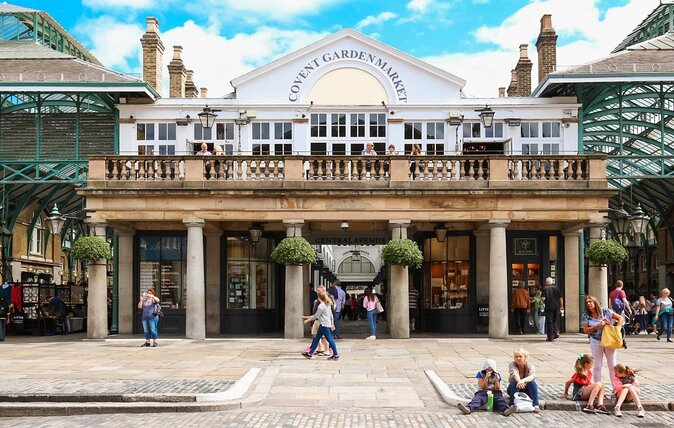
From Chinatown, you’ll walk into Covent Garden, where the scene changes again. This area gives you architecture—think the Royal Opera House area—plus the pedestrianized piazza with street entertainers and plenty of small angles for modern compositions.
At Covent Garden, the guide focuses on fast-moving subjects and how to respond with your camera settings. You’ll learn about shutter speeds for action and different focus modes so you have a better chance of getting performers sharp while still capturing the energy of movement. If street performers are your thing, this is likely your favorite teaching moment because the feedback happens immediately: you shoot, you adjust, you try again.
You’ll also photograph the Apple Market area and explore artisan and designer stall displays. Even if you’re not buying anything, these setups give you repeating patterns, signs, and colorful details that help you practice framing and contrast.
The time here is about an hour, and the layout is ideal because you can switch between wide shots (architecture and space) and tighter shots (stalls, details, entertainers).
Neal’s Yard: composition and framing in a small, colorful courtyard
Neal’s Yard is a shorter finish—about 30 minutes—but it’s a smart one. This is where you take everything you’ve learned and apply it to a more contained environment: intimate courtyards, colorful walls, and shopfronts that reward good framing.
Here, the guide emphasizes composition and framing. It’s a good place for testing whether you can step back and see the whole image, then move in for a detail shot with clean edges. Courtyards like this also let you control your background more easily than a street full of traffic.
If you want a few photos that look like they belong together—same color mood, same style—Neal’s Yard helps you close the tour with images that feel planned.

What the private coaching + photo review actually gives you
The main value isn’t that you walk past famous spots. It’s how you learn to use your camera while you’re there.
A key part of the experience is the guide’s ability to work with many camera types, and the instruction is structured around what you can change immediately: aperture, depth of field, shutter speed, and focus choices. That makes it more practical than a generic “take photos anywhere” stroll.
You also get a review of photographs you’ve taken, plus guidance on how to develop your skills. There’s a built-in short working break for refreshments where your shots get checked and discussed. That’s not just a nice-to-have; it’s a learning accelerator. You see what worked and what to try next before the rest of the walk locks in those moments.
If you’re restarting after a long break, that’s useful too. One common situation is owning a new camera with lots of menus, but not feeling confident about the settings. This tour is built to help you navigate those basics in the real world so you’re not learning theory while London moves on without you.
And because it’s private to your group, you can aim the coaching at what you want—street scenes, architecture, portraits, or close-ups. You’re not stuck with someone else’s interests.
Price and value: $347.77 for a mini photo workshop on streets
At $347.77 per person for about four hours, you should think of this less like a budget walking tour and more like a guided photo lesson with real critique.
Here’s what you’re paying for, based on how the experience is designed:
- Expert guidance during shooting, not just at the start and end
- A photo review step where you get feedback while the experience is still unfolding
- Subject variety that forces you to practice multiple camera skills: light, aperture, depth of field, shutter speed, and focus
- Private format so instruction can be tailored to your camera and your goals
If you already know your basics and you mostly want “great photos with minimal fuss,” you might not feel the value as strongly. But if you want to improve—especially if you want cleaner composition and more confident camera control—this cost starts to make sense.
One thing to plan for: refreshments and lunch are not included, so budget for at least a snack stop. Also, bring extra memory cards because you’ll likely shoot more than usual once you start testing settings.
Who should book this tour (and who may want a different option)
This is a strong match if:
- You’re a first-time London visitor who wants a focused introduction with photo guidance
- You want to learn or refine camera skills (all digital cameras and smartphones are supported)
- You like street scenes and architecture, and you’re excited to photograph both close details and wider views
- You want private instruction instead of a group tour format
You might reconsider if:
- You’re looking for a relaxed sightseeing walk with no real shooting focus
- You hate walking for about four hours and don’t want to carry your camera gear
Best outcome comes when you show up ready to experiment. Change one setting at a time, take a few shots, then adjust.
Quick practical tips before you go
Bring:
- Your own camera and a fully charged battery
- Extra memory cards, since you’ll shoot a lot
- A digital-friendly mindset: it’s meant for experimentation
Wear for weather. The tour runs in all weather conditions, so dress appropriately. And because the walking pace is kept relaxed, you’ll still have time to stop and compose—but you should expect to be on your feet.
Meeting is at Charing Cross Strand (WC2N 5HF) and the tour ends at Neal’s Yard (WC2H). It’s near public transportation, which makes it easier to connect with the rest of your day.
Should you book this photography walking tour from Trafalgar Square to Covent Garden?
Yes, if you want real improvement—not just a nice route. The big reason I’d book it is the mix of structured camera lessons plus practical photo feedback during the walk, all in locations that force you to practice different subjects: monuments, portraits, Chinatown color, street action, and courtyard composition.
Book it especially if you’re:
- rebuilding confidence with a camera you don’t fully know yet
- traveling with someone who wants to learn too (private means you can still stay focused on your goals)
- aiming for a set of photos that feel intentional, not random
If you’re unsure, do a quick self-check: do you enjoy adjusting settings and taking multiple shots to get the one you want? If yes, this tour is likely a smart use of your time in London.
FAQ
How long is the photography walking tour?
It runs for approximately 4 hours.
What is the price per person?
The price is $347.77 per person.
Is this tour private?
Yes. It’s a private tour exclusive to your group.
Is the tour suitable for beginners and all digital cameras?
Yes. It’s suitable for all skill levels and for all digital cameras, including smart phones.
What should I bring?
Bring your own camera with a fully charged battery, and consider bringing additional memory cards.
Where does the tour start and end?
It starts at Charing Cross Strand, London WC2N 5HF, UK and ends at Neal’s Yard, London WC2H, UK.