REVIEW · LONDON
Jack the Ripper Private Immersive Tour
Book on Viator →Operated by Jack the Ripper Walks · Bookable on Viator
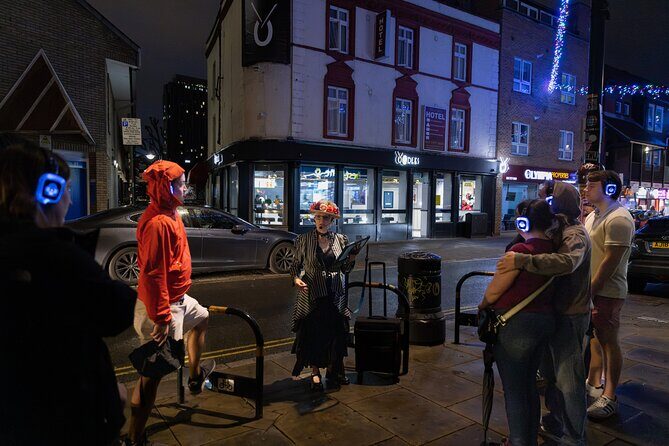
A true crime walk in London feels different at night. This private Jack the Ripper tour strings together specific murder sites with a live guide who answers questions on the spot, all while you follow the trail with high-tech headphones and tablet photos. The main thing to consider is simple: you’ll walk for about 2 hours 30 minutes with no break.
What I like most is how practical it feels. You’re not stuck inside a building. You’re outside, looking at the streets where key moments played out, and the guide’s pacing keeps the story clear even when the lighting gets dim.
The second big win is control. This is a private group, so the conversation can stay focused on what you actually want to know, whether that’s Elizabeth Stride’s timeline or how the police search changed the case. Just plan on good shoes and a steady pace from Aldgate Station to the end near Bell Lane.
In This Review
- Key Highlights Worth Knowing
- Jack the Ripper, Told on the Streets Where It Happened
- Price and Value: Why $47.52 Can Still Feel Like a Deal
- Meeting at Aldgate and Ending Near Bell Lane: Practical Routing
- Stop-by-Stop: Whitechapel, the City Clue Trail, and the Letters
- Stop 1: Dorset(t) City Hotel and the 1888 Setup
- Stop 2: St Botolph’s Aldgate and Life Without Comfort
- Stop 3: Mitre Street and Elizabeth Stride’s Evening
- Stop 4: Mitre Square and Catherine Eddowes Found on 30 August 1888
- Stop 5: Goulston Street and the One-Doorway Clue
- Stop 6: Wentworth Street and a Likely Extra Victim
- Stop 7: Osborn Street and 1888 Pub Music Energy
- Stop 8: Brick Lane and Polly Nichols at the Frying Pan Pub
- Stop 9: Brick Lane Again and Community Questioning
- Stop 10: Hanbury Street and Annie Chapman’s Final Night
- Stop 11: Wilkes Street and Outrage in the Neighborhood
- Stop 12: Puma Court and the Letter Sent to the Press
- Stop 13: Commercial Street, Ten Bells, and Christchurch Graveyard
- Stop 14: Brushfield Street and the Lusk Letter at the Exchange
- Stop 15: London Fruit & Wool Exchange Courtyard and Mary Kelly’s Final Room
- The Headphones, Tablet Photos, and Keeping Up in the Dark
- Suspects, Police Jurisdiction, and How to Think About Whodunnit
- Who This Tour Suits (and Who Might Want a Different Option)
- Should You Book This Jack the Ripper Private Walk?
- FAQ
- How long is the Jack the Ripper private tour?
- How much does it cost per person?
- What is included in the tour?
- Is the tour private?
- Where does the tour start and end?
- Do I need good weather?
- What’s the cancellation policy?
Key Highlights Worth Knowing
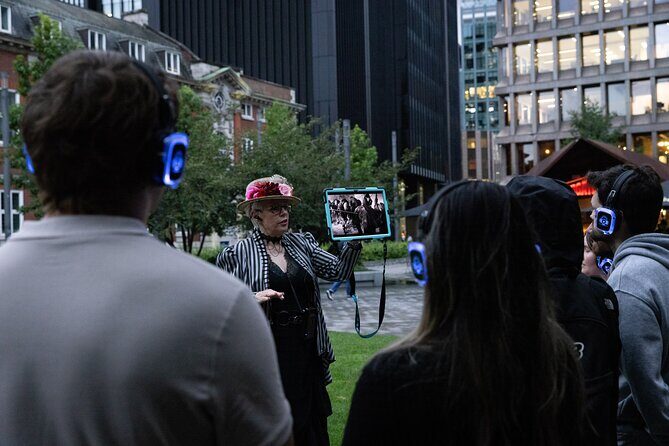
- Headphones + a 14-inch tablet help you see photos clearly, even when it’s dark.
- Private guide with Q&A means you can ask follow-up questions as you go.
- Stops cover more than the famous five, including a likely additional victim discussed by criminologist David Wilson.
- You’ll learn why Metropolitan Police and City of London Police were separate, and how that mattered.
- The route ties together locations tied to major evidence, including letters and the one doorway clue on Goulston Street.
- The tour ends with a quick way to get to transit, with guidance toward Liverpool Street Station.
Jack the Ripper, Told on the Streets Where It Happened
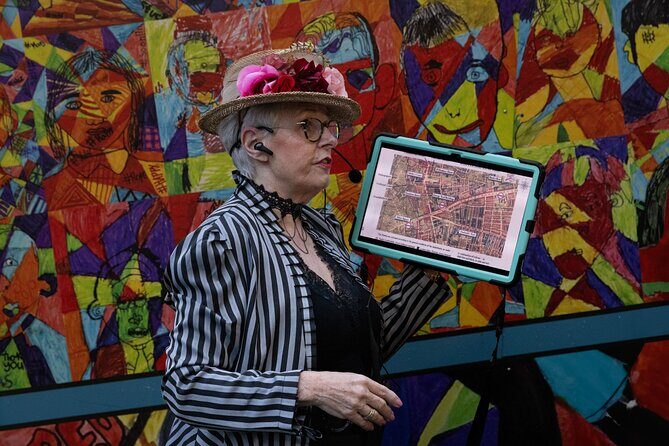
If you like your stories grounded in real places, this is a strong pick. Instead of a slideshow lecture, you’re walking between sites tied to the murders and the investigation. The guide uses the street grid itself to make the timeline feel less abstract.
You also get a sense of what life was like in 1888, not just the blood-and-gore parts. One of the best moments is hearing how lodging, workhouse life, and unemployment shaped who was vulnerable. That context matters, because it explains why the victims’ stories were not isolated tragedies.
This is also a good fit for people who want conversation. With a private guide, you can steer questions toward police procedures, the meaning of letters, or how the “clue trail” is interpreted today. That’s a nice change from tours where you’re only allowed to listen and move on.
You can also read our reviews of more private tours in London
Price and Value: Why $47.52 Can Still Feel Like a Deal
$47.52 per person is not free money. But for this length and format, the value comes from the built-in tech and the route density.
You’re paying for three things that usually cost extra on other tours:
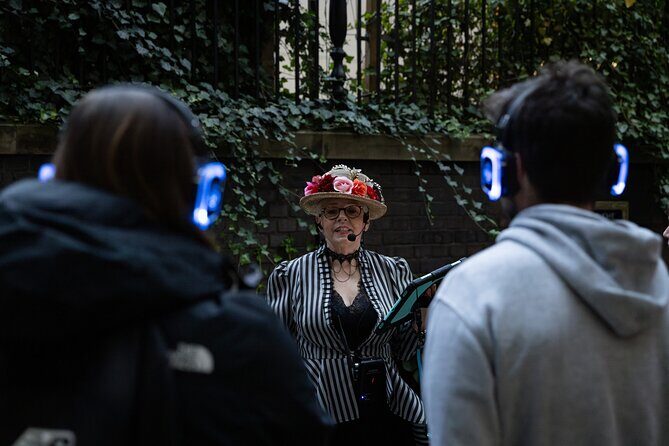
- Hi-tech headphones, which keep the guide’s narration clear while you walk.
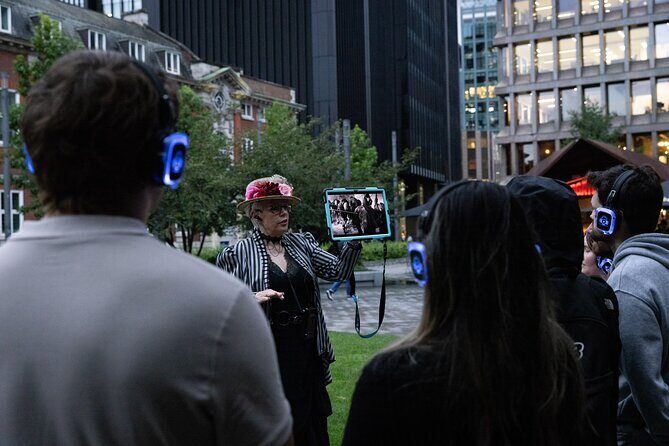
- Tablet-based visuals at multiple stops, including photos that show victims and locations.
- A private format, where the guide can slow down for questions instead of racing a fixed script.
There’s also something underrated: the stops don’t rely on expensive attractions or paid entry fees. The itinerary notes free admission for each site stop, which helps keep your total cost from ballooning.
Meeting at Aldgate and Ending Near Bell Lane: Practical Routing
The tour starts at Aldgate Station (Aldgate, London EC3A). That’s convenient because it’s easy to reach by public transport, and it lets you start without wasting time in transit hell.
You’ll finish at Bell Lane, London E1. That end point is close enough to major transit connections that you’re not stuck wandering. The guide also directs you toward the shortest route to Liverpool Street Station, which is a big quality-of-life win after a long walk.
Timing matters here. The tour runs Monday through Thursday during the listed window, with operating hours from 3:00 PM to 9:00 PM. I’d aim to get there early enough to settle your headphones and start relaxed, because you’ll have a smooth flow only if your first few minutes are calm.
Stop-by-Stop: Whitechapel, the City Clue Trail, and the Letters
This route moves through parts of London that still feel working-class and lived-in. The story stays tied to geography, and the guide’s narration connects each scene to what came next.
Stop 1: Dorset(t) City Hotel and the 1888 Setup
You start with an introduction at Dorsett City Hotel. Expect the guide to frame the murders within the context of 1888 and to explain what the area looked like then.
This opening matters because it gives you a base layer: what the city was like, how people moved through neighborhoods, and why the murders caused panic. Without this, the later stops can feel like disconnected points on a map.




Stop 2: St Botolph’s Aldgate and Life Without Comfort
At St Botolph’s Aldgate, you’ll hear a detailed picture of daily life in 1888. The focus is on homelessness, common lodging houses, and the realities of limited employment.
I like this stop because it shifts the tour away from sensationalism. You’re not only tracking a killer. You’re learning why the victims’ choices were often narrowed by money and circumstances.
A small practical note: this stop happens on the green, and it’s outside. If it’s cold or windy, it may slow you down emotionally, not physically, because you’ll be standing and listening.
Stop 3: Mitre Street and Elizabeth Stride’s Evening
At Mitre Street, the guide turns to Elizabeth Stride. You’ll hear what led up to her murder and how Louis Diemschultz discovered her body at the gateway of Dutfield’s Yard.
The tour uses accompanying photos to show the street and victim area. That’s helpful because the physical layout is what many theories hinge on.
Stop 4: Mitre Square and Catherine Eddowes Found on 30 August 1888
In Mitre Square, you’ll hear about Catherine Eddowes, found dead and mutilated on 30 August 1888. The guide explains how PC Edmund Watkins discovered her on his beat, and you’ll follow the search route Jack was pursued right up to where a clue was found.
This stop can feel intense because it shows how quickly events snowballed. One murder happened, then another followed within an hour. The pace of the story reflects how fast fear spread.
Stop 5: Goulston Street and the One-Doorway Clue
Opposite 108–119 Goulston Street, you’ll view the doorway where the only clue in the case was found. Your guide will explain what happened after the discovery, and also clarify the police situation: Metropolitan and City of London Police were separate then, and still operate separately today.
This is one of the most important “how-did-the-system-work” moments in the tour. It’s easy to blame a mystery on the killer alone. Here you see how jurisdiction and procedure can shape what evidence gets handled—and what gets missed.
Stop 6: Wentworth Street and a Likely Extra Victim
At Wentworth Street, you go back to consider a victim not included among the canonical five, but credited as a likely victim by criminologist Professor David Wilson.
The guide describes the murder take place and also discusses what people think came afterward. If you love modern criminology theories, this is where you’ll feel the tour stretching beyond the usual “greatest hits.”
Stop 7: Osborn Street and 1888 Pub Music Energy
As you turn the corner into Brick Lane, you’ll hear music as it may have sounded coming out of pubs and music halls in 1888.
This short stop is practical storytelling. It helps you picture movement and sound, not just buildings. When the next streets feel unfamiliar, this brief sensory cue makes them click.
Stop 8: Brick Lane and Polly Nichols at the Frying Pan Pub
At Brick Lane, opposite the Frying Pan pub, the guide tells the story of Polly Nichols. You’ll hear how desperation for lodging money may have pushed her into a vulnerable situation.
You’ll also hear how two men discovered her body in Berner’s St Whitechapel, and that police were sent once the scene was found, though Polly was already dead. Tablet photos show the victim and the murder site, which helps you keep the story anchored to what you’re seeing.
Stop 9: Brick Lane Again and Community Questioning
As you leave Polly Nichols’ story, you’ll hear about street vendors selling wares and police questioning members of the local community for suspicious men.
This is a good reminder that investigations are made of conversations and impressions, not just dramatic confrontations. You learn how fear changes behavior, too—people notice things differently when terror is in the air.
Stop 10: Hanbury Street and Annie Chapman’s Final Night
At Hanbury Street, the tour focuses on Annie Chapman. You’ll hear about her life and the events leading up to her death on 8 September 1888.
The guide describes how Annie was seen less than an hour before she was murdered, by Mrs Long, with a man outside no 27. Then you hear how she was enticed into the backyard of 29 with promises of money, followed by a brutal murder.
This stop uses accompanied photos again for both the victim and murder site. Since the material is heavy, it helps that the guide keeps the narrative structured instead of spiraling into spectacle.
Stop 11: Wilkes Street and Outrage in the Neighborhood
Walking down Wilkes Street, the story shifts to the neighborhood response. You’ll hear about outrage among local residents and how newspapers fueled terror.
The guide also points out houses that date back to the 1700s, and discusses why that built environment matters when you’re trying to understand movement, hiding places, and distance between locations.
Stop 12: Puma Court and the Letter Sent to the Press
At Puma Court, you’ll stop to look at one of the letters received by the press. The guide notes that there were 1,092 letters sent to the police and press, but this one (and one other) stood out as important.
This stop ties the story to information chaos. When lots of letters flood in, the police are stuck sorting real signal from noise—exactly the kind of problem modern investigators still face.
Stop 13: Commercial Street, Ten Bells, and Christchurch Graveyard
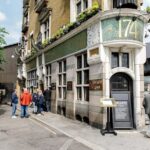
Opposite the Ten Bells—Mary Kelly’s favorite pub—you’ll hear about the Spitalfields Market area and how Jack the Ripper caused controversy over the years.
You’ll also learn about Christchurch Graveyard and how it mattered to homeless people at the time. The guide discusses how things that seem basic today were not basic then, which led to fights between people struggling to survive.
This is where the tour feels most like social history. You see how the case collided with poverty, overcrowding, and competition for safety.
Stop 14: Brushfield Street and the Lusk Letter at the Exchange
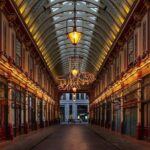
At the entranceway of the London Fruit and Wool Exchange Building, you’ll hear about the other letter of importance: the Lusk letter. The guide explains how it arrived in a box with an item that could have come from one of the victims, plus photos of the letter and recipient.
Even if you don’t care about paperwork details, this stop helps explain why letters mattered. In a case that didn’t offer easy forensic answers, written claims became part of the evidence landscape.
Stop 15: London Fruit & Wool Exchange Courtyard and Mary Kelly’s Final Room
In the central courtyard, you’ll reach the site closest to where Mary Kelly, the last victim, was murdered in her own room. The guide emphasizes that she was the youngest victim and the only one killed indoors.
You’ll hear the events leading up to her death and the murder itself in gruesome detail. After that, your guide talks about suspects from then and now and shares a theory on who might have been responsible.
Finally, you’ll get direction for the shortest route to Liverpool Street Station. It’s a thoughtful closing because you’re done with the heavy story and you still need a practical exit.
The Headphones, Tablet Photos, and Keeping Up in the Dark
This tour’s tech is not just a gimmick. The headphones are part of how the guide stays audible while you walk and look around.
The itinerary explicitly mentions photos shown on a 14-inch tablet that are easy to see even when it’s dark. That’s a real advantage on night walks, where trying to read a screen in the street can be frustrating.
One hearing-related caution: there’s a mic involved on busier nights. I saw an account of a guest who is hard of hearing having trouble hearing most of the narration when the mic and surroundings didn’t work for their needs. The fix was straightforward: if you’re hard of hearing, stand at the front where you’ll have the maximum chance to hear clearly.
If you want the best experience, don’t multitask with your phone. Keep your attention on the guide, then use the tablet visuals as the anchors.
Suspects, Police Jurisdiction, and How to Think About Whodunnit
The tour doesn’t try to force one single certainty. It shows how evidence was handled and why the investigation was complicated.
The Metropolitan vs City of London Police split is a major theme. Once you understand that separation, many mysteries start to look less like one big riddle and more like a chain reaction of procedures and boundaries.
The ending theory—about who the killer might have been—adds closure without pretending the case was solved. Instead of treating the story like a solved fact, you get a sense of how modern criminology may reframe old assumptions, like the discussion of Professor David Wilson’s likely extra victim.
Who This Tour Suits (and Who Might Want a Different Option)
This is best for:
- True crime fans who want place-based storytelling rather than generic history.
- People who like asking questions and getting direct answers from a guide.
- Visitors who enjoy street-level context, like poverty conditions and police workflow.
It’s less ideal if:
- You need frequent seating or a break. The tour is about 2 hours 30 minutes with no break.
- You have walking or standing difficulties. The tour notes it’s not recommended for people with walking or standing difficulties.
- Weather is bad. The experience requires good weather.
One more practical tip: wear shoes you can walk in for a long stretch. You’ll be moving between stops often enough that sore feet can ruin the mood, even if the story is fascinating.
Should You Book This Jack the Ripper Private Walk?
I’d book it if you want a guided, question-friendly night walk that treats locations and evidence with seriousness. The combination of headphones, tablet photos, and a route that hits key clue moments (including major letters and the Goulston Street doorway) makes it feel efficient and focused for the price.
Skip it if you dislike walking without breaks or if you know you’ll struggle with audio quality outdoors. If that’s your situation, choose carefully where you stand and consider whether a tour with guaranteed seating or fewer night distractions would suit you better.
If you do book, come with curiosity. The best part isn’t just learning what happened. It’s understanding how the city, the police system, and the fear of 1888 shaped what could—and couldn’t—be solved.
FAQ
How long is the Jack the Ripper private tour?
The tour runs for about 2 hours 30 minutes.
How much does it cost per person?
It costs $47.52 per person.
What is included in the tour?
You get hi-tech headphones.
Is the tour private?
Yes. It’s listed as a private tour/activity, and only your group participates.
Where does the tour start and end?
It starts at Aldgate Station, London EC3A and ends at Bell Lane, London E1.
Do I need good weather?
Yes. The experience requires good weather. If it’s canceled due to poor weather, you’ll be offered a different date or a full refund.
What’s the cancellation policy?
You can cancel for a full refund up to 24 hours before the experience. If you cancel less than 24 hours before, you won’t get a refund.