Tiny studio time with serious color skills. In a compact London workshop near Bedlam Mews, you learn enamel techniques that go from silver base to kiln-baked finish. I like that the class keeps things personal, with small-group coaching (often just a handful of people) and clear instruction from start to polish.
You’ll also appreciate the hands-on structure. Tools and materials are included, and the lesson walks you through design, enamel application, then firing in a kiln—with one-on-one support from the teacher (and in at least one class I’ve seen, Mabel’s guidance made a big difference). The only drawback to plan around is that group size can change by date—one busy event ran larger than expected, so it may feel a bit less calm than the ideal four-person vibe.
In This Review
- Key Highlights You’ll Actually Feel
- First Stop: Zoey Filigree, Bedlam Mews (SE11 6DF)
- Enamel Basics: What You’re Making and Why It’s More Than Decorative
- From 40 Silver Blanks to a Sketch You Can Actually Use
- The Main Event: Applying Enamel Powder with Real Color Support
- Kiln Time: Why Heat Is the Craft’s Creative Finish
- Finishing and Polishing: Getting from Fired Piece to Wearable Jewelry
- Price and Value: What $94.10 Really Buys You
- Group Size Reality: Small When It’s Calm, Busy When It’s Not
- Who Should Book This Enamel Class (and Who Might Skip It)
- Quick Tips Before You Go
- Should You Book It?
- FAQ
- What is the duration of the Enamel Jewellery Making Class?
- Where does the class meet?
- What is included in the price?
- Are silver chains or extra blanks included?
- How big is the class group?
- What language is the class offered in?
- Is it weather-dependent, and what are the cancellation terms?
Key Highlights You’ll Actually Feel
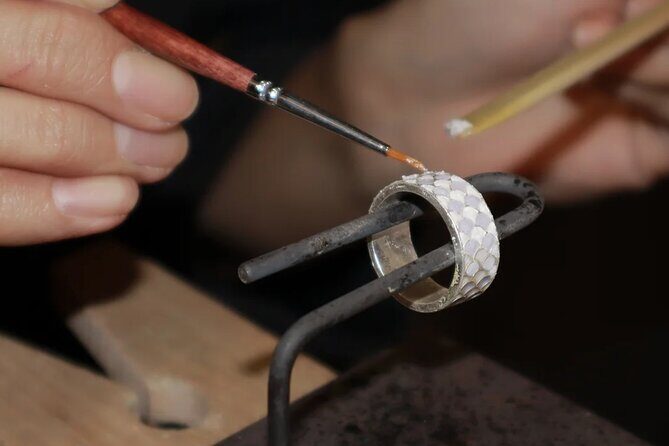
- Small-group format: typically no more than four in the studio, with a maximum of eight
- Tools and materials included: you get the kit, not just a tutorial
- Real techniques, real process: cloisonné and plique-à-jour-style approaches, plus practical enamel know-how
- Choose from 40 design blanks: you start by picking your silver base
- Color guidance at the bench: help with blending, layering, and effects while you work
First Stop: Zoey Filigree, Bedlam Mews (SE11 6DF)
The workshop starts at Zoey Filigree on Bedlam Mews, London (SE11 6DF). The session runs about two hours with a 2:00 pm start, and it ends back at the same meeting point, so you’re not stuck crossing town afterward in a craft-carrying mood.
If you’re using public transit, this area is workable—you’re near transit lines, and the venue is easy to reach without a car. One more small win: you’ll be able to use a mobile ticket, which cuts out the “where did I put my printout” stress.
A few more London tours and experiences worth a look


Enamel Basics: What You’re Making and Why It’s More Than Decorative
Enamel sounds fancy, but in this class it’s taught as a practical craft. You’ll get a short intro that covers enamel’s significance, what enamel is in plain terms, and where it’s used in jewelry and decorative art.
You’ll also hear about enamel techniques—specifically styles such as cloisonné and plique-à-jour. Even if you’ve never heard those names, don’t worry. The point is to understand the logic behind them: the way powdered color sits on metal, how layers change the look, and why firing in a kiln matters.
This context helps you make better choices at the bench. Instead of guessing, you’ll know what you’re aiming for when you blend colors, plan layers, and decide how much detail to sketch onto your blank.
From 40 Silver Blanks to a Sketch You Can Actually Use
One of the most satisfying parts is the early stage: choosing your base. You’ll pick from 40 different design options for your fine silver blank. This matters more than it sounds, because your blank shape drives where the enamel powder goes and how the final edges catch the light.
After choosing, you’ll work through:
- filing the blank (to prep it properly)
- designing and sketching (so you have a plan before the color hits)
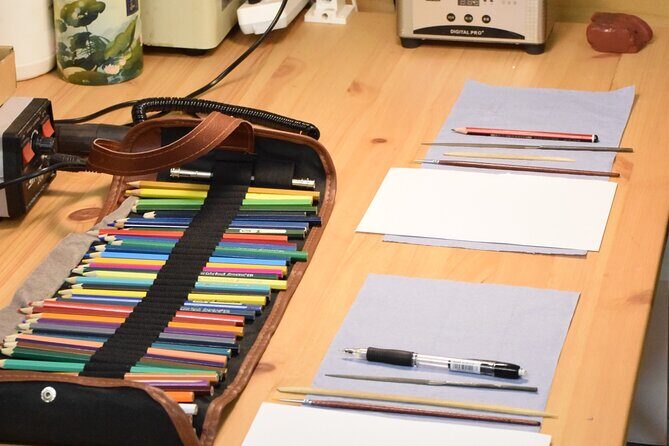
You’ll have paper and pencil for the sketch stage, plus the tools to shape and prep the silver. Having those steps built in is great for beginners. Even if your drawing skills are modest, you’re not expected to invent an artwork from scratch—you’re translating an idea into a layout you can follow while working with powder.
The Main Event: Applying Enamel Powder with Real Color Support
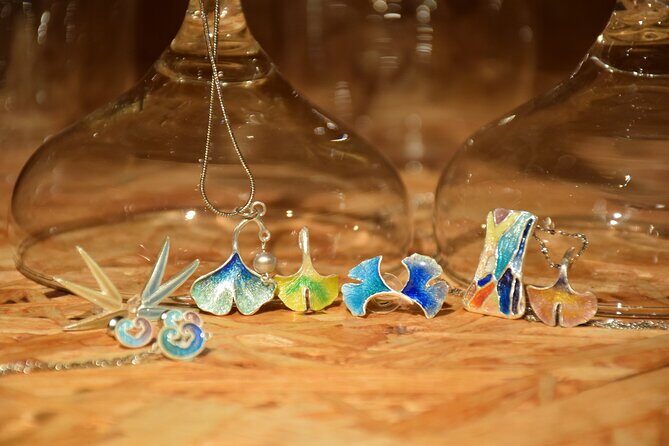
This is where the class earns its money. You’ll get a demonstration on applying enamel powder, then practical, one-on-one guidance while you work.
The instructor helps you with the stuff that’s hard to learn from videos:
- color blending so transitions look intentional
- layering so you get depth instead of a flat color block
- achieving the effects you’re aiming for (within the limits of the craft and timing)
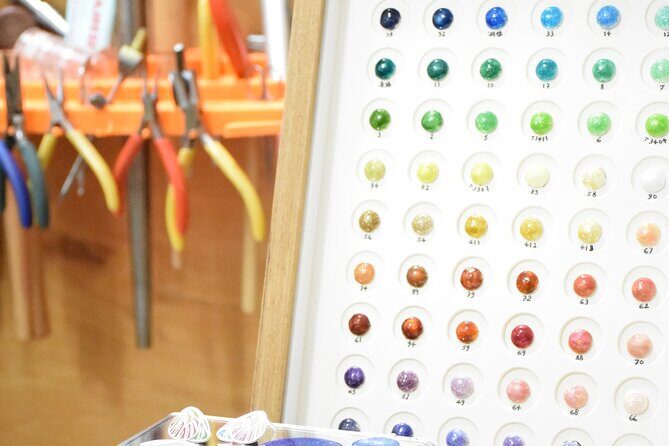
You’ll work with enamel color palettes and color lead, and you’ll use sandpaper and polishing compound later for finishing. But the coaching is focused on decisions you make in the moment—how thick to lay powder, where to concentrate color, and how to keep edges from getting messy.
From what I’ve seen in real class experiences, this is also where a teacher’s style matters. In one instructor-led session, Mabel’s guidance was singled out as a key reason people left with a pin and necklace they felt genuinely proud of. That aligns with what you’d want from a class like this: not just a “good luck,” but feedback while your piece is still workable.
Kiln Time: Why Heat Is the Craft’s Creative Finish
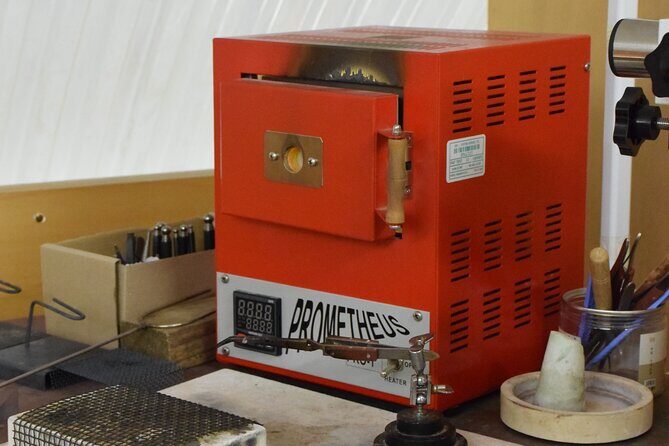
Once you’ve applied your enamel, the piece goes into the kiln for baking. That step can feel mysterious if you’ve never worked with enamel, but the class treats it as part of the process, not a black box.
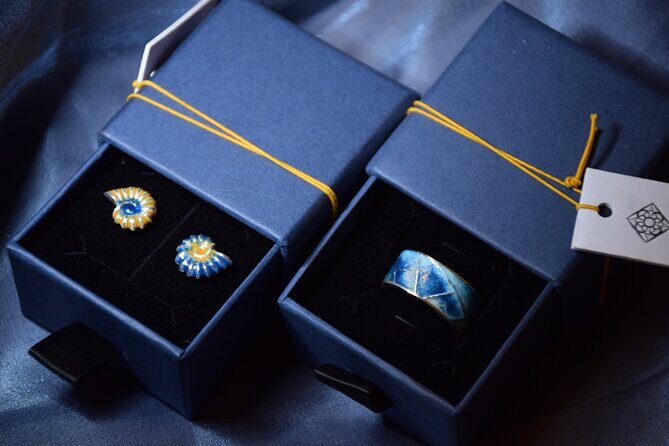
Here’s what kiln time changes: the enamel powder fuses to the metal base and transforms from loose powder texture into the hardened, glass-like surface you see in finished enamel jewelry. It’s also why the earlier guidance matters—layers and blends only work if you planned them before firing.
You don’t have to manage kiln timing yourself in this workshop; instead, you focus on building the piece that’s ready to be fired. That’s one of the reasons this is such a good beginner workshop: you learn the creative decisions without having to engineer the whole workflow.






Finishing and Polishing: Getting from Fired Piece to Wearable Jewelry
After firing, you’ll finish and polish your enamel piece. This step is where your workshop work becomes something you can wear, pin, or show off.
You’ll use polishing compound and finishing tools to bring the metal and enamel into a clean final state. The class also includes support through these steps, so you’re not left hoping the piece will look fine after the kiln.
If you’re thinking, Will my first attempt look “professional”?—that’s the right question. In a class like this, the expectation is you’ll learn. But the combination of guided enamel application plus finishing support is what helps beginners walk out with results that look like jewelry, not a craft project that needs fixing.
Price and Value: What $94.10 Really Buys You
At $94.10 per person for about two hours, the biggest value is what’s included. The booking price covers:
- fine silver blanks and the working materials
- files, cutters, and other hand tools
- enamel color palettes and supplies
- a kiln and tools like a rotary micromotor (mentioned as part of the included tool set)
So you’re paying mostly for instruction plus the equipment you can’t easily recreate at home—especially the kiln step. That’s a major cost driver for enamel work, because firing isn’t something most people have in their kitchen.
What costs extra are jewelry components and blank sizes beyond what’s covered. Accessories like silver chains cost extra (not included), and medium or large silver blanks come with add-on pricing (depending on what you choose). If you’re planning to leave with a specific style—pin versus necklace—factor in whether you’ll need extra components at checkout.
In plain terms: if you want the full “I made this” wearable outcome, it’s smart to arrive ready to add what you need for the final jewelry setup. If you only want the enamel piece base, you might find the included kit is enough.
Group Size Reality: Small When It’s Calm, Busy When It’s Not
The ideal setup is an intimate studio group, with no more than four in the workshop environment. But keep one practical consideration in mind: group size can vary by date. One class run for a special occasion ended up with a larger group, which made the session feel more chaotic than ideal.
If you hate waiting for attention, choose your date wisely. A quieter time slot should mean more hands-on check-ins while you apply enamel powder and while you prep your design.
This is also why “one-on-one guidance” is such a big deal here. When the instructor can focus on each person, your color choices improve fast—and your confidence rises right before the kiln step.
Who Should Book This Enamel Class (and Who Might Skip It)
This workshop fits you best if you want a hands-on art class where you leave with a finished item you can wear or keep. It’s a good match for beginners because the session includes:
- a structured process (intro, design, enamel application, kiln, finishing)
- direct help while you work
- enough time to make real decisions about color and layering
It’s also a great choice if you like crafts that have a clear “before and after.” Your piece changes dramatically after the kiln, and you’ll see the transformation rather than just taking home supplies.
You might want to skip this, or at least manage expectations, if you want a mostly observational experience or if you strongly dislike group dynamics. Enamel requires focus and fine steps, so a larger crowd can make the pace feel tighter.
Quick Tips Before You Go
You don’t need special prep, but a little planning helps:
- Think about what jewelry you want at the end (pin, necklace, or another option), and budget for any extras if needed.
- Bring curiosity for the technique names. Cloisonné and plique-à-jour get explained in the class, but you’ll enjoy it more if you’re willing to learn the logic behind them.
- Plan to stay present. The kiln step depends on timing after powder work, and the finishing stage happens after your piece is fired.
Should You Book It?
Yes, if you want a compact, beginner-friendly London art class that trades sightseeing calories for a real craft result. For the price, you’re getting instruction plus the expensive part you can’t DIY easily: kiln firing and professional enamel tools.
Book it when you want a calm, guided workshop experience with meaningful one-on-one support—especially if you’re aiming to take home a wearable enamel jewelry piece. If your schedule is flexible, aim for a quieter date to keep the group dynamic close to the small-studio ideal.
FAQ
What is the duration of the Enamel Jewellery Making Class?
The class runs for about 2 hours.
Where does the class meet?
The meeting point is Zoey Filigree, Bedlam Mews, London SE11 6DF, and the activity ends back at the same meeting point.
What is included in the price?
All material and tools are included, including items like files, cutters, a rotary micromotor, and access to the kiln.
Are silver chains or extra blanks included?
Accessories like silver chains are not included. Medium silver blanks and large silver blanks are also not included and cost extra.
How big is the class group?
The experience has a maximum of 8 travelers, and it’s described as an intimate group with no more than four in the studio.
What language is the class offered in?
The class is offered in English.
Is it weather-dependent, and what are the cancellation terms?
Yes, good weather is required. If it’s canceled due to poor weather, you’ll be offered a different date or a full refund, and you can cancel for a full refund up to 24 hours in advance.